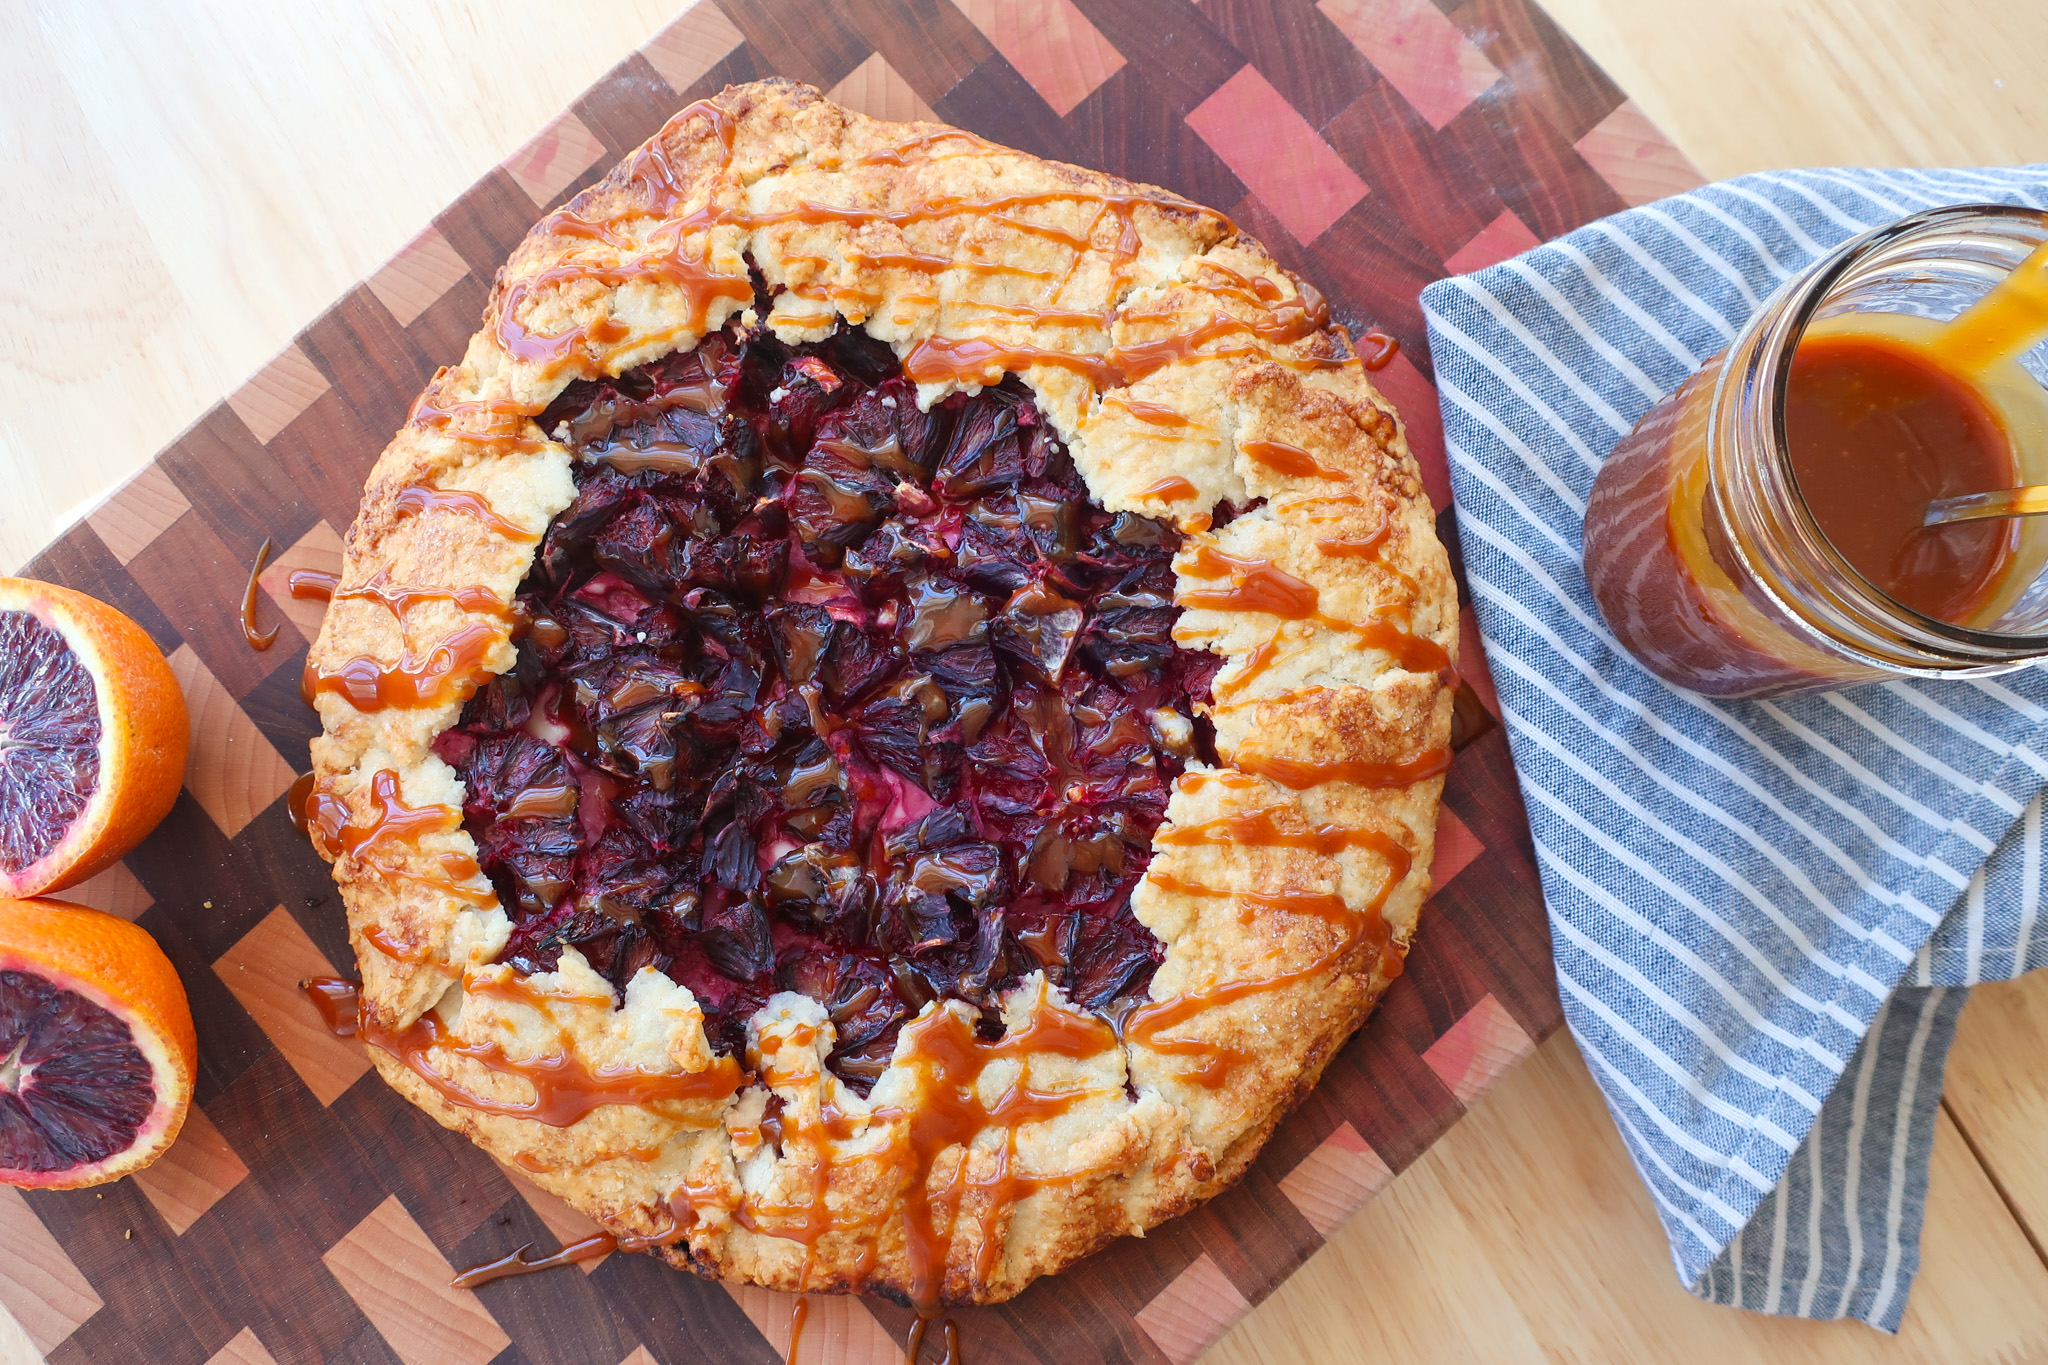
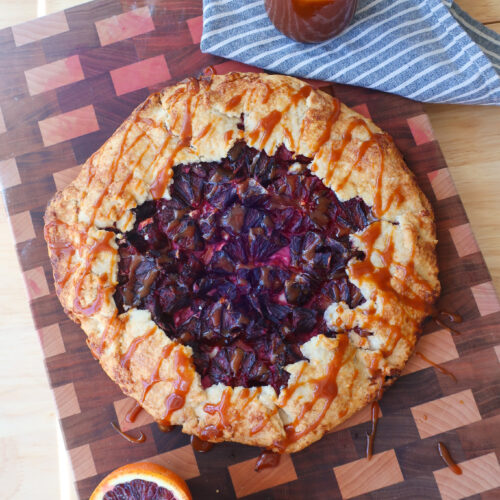
Blood Orange Rustic Galette with Easy Salted Caramel Drizzle
I’m forever inspired by the crepe suzettes we made in pastry school – crepes dipped in an orange caramel and topped with fresh orange segments. Mostly because I truly didn’t expect to like it and ended up loving it. The balance of sweet and citrusy was everything right with my taste buds. I honestly love learning new flavor pairings and things that, at one point, I probably wouldn’t have liked but now really, really do.
One of my inspirations from said recipe created this Orange Olive Oil Cake with Brown Butter Cream Cheese Frosting topped with pools of salted caramel. So good that even one of my friends (and then one of their friends) said it may very well be the best cake they’ve ever had.
So, if you haven’t had a citrusy-caramel action in one bite yet, give this galette a try and see how delicious you find it.
To note, I’ve slightly adapted the salted caramel recipe below from one I received from Chef Ash, the head teacher at my pastry school!
If you love this recipe, please rate and review it below and tag @accentgolden in your posts on social!
BLOOD ORANGE GALETTE WITH SALTED CARAMEL
If you don’t know, a galette is really just a flat pie. No dish is required, just a bit of parchment paper and a baking sheet. They’re no fuss and oh so delicious. You’ll roll out the pie dough as you would for a classic pie, pop it in the fridge to chill (cause the butter needs to reset before it hits the oven!), and top with your fillings before folding in the sides and baking.
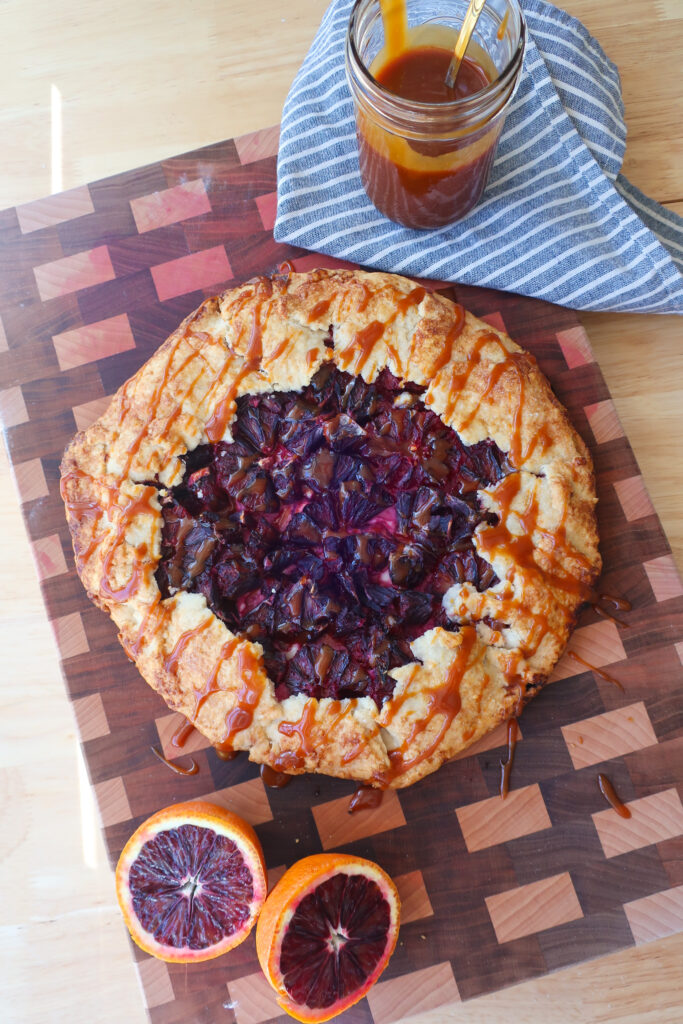
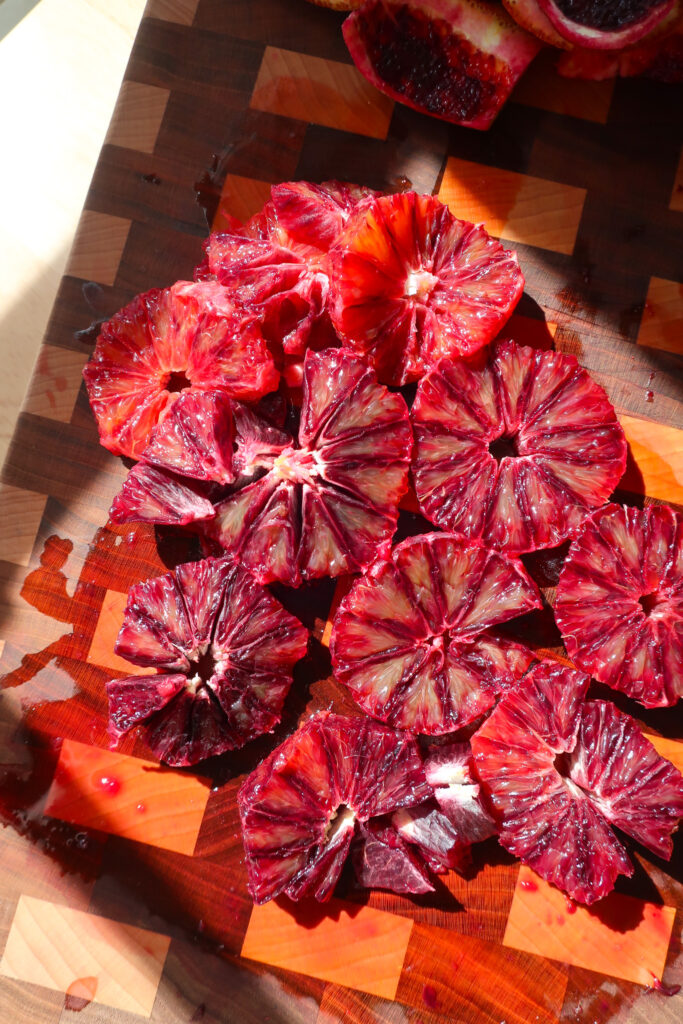
For this galette, we’re spreading a little sweetened cream cheese in the middle of our dough, topping it with sliced blood oranges – which give both tart and berry flavors on top of the natural citrus – and then, once baked, drizzling it with a quick, homemade salted caramel. It’s sweet, it’s buttery, it’s a little bit tart, and oh so delicious!
How to ensure your pie crust doesn’t leak while baking: As you fold the lip of your dough over your filling to form your edge, fold one piece over the next almost at a diagonal. This way, from fold to fold, you’re creating an overlap as you seal your galette. If you notice any cracks appear, this crust is buttery! Simply, smear them together with the tips of your fingers – if you need a little help, dampen the tip of your finger with water to loosen the dough you’re trying to connect.
INGREDIENTS
- Flour: Provides structure to your dough so it can hold its shape while rolling
- Salt: Strengthens your dough and balances with the butter to flavor your delicious crust
- Unsalted Butter: Gives a delicious flake to your crust and flavor to both your dough and caramel, giving your caramel a smooth texture as well
- Cold Water: Binds together your crust and is the “wet” in your caramel
- Egg: Beaten with a little milk or water to form an egg wash for that golden crust
- Course Sugar: For that crunchy bakery topping (you can also use granulated sugar if you don’t have any turbinado sugar on hand!)
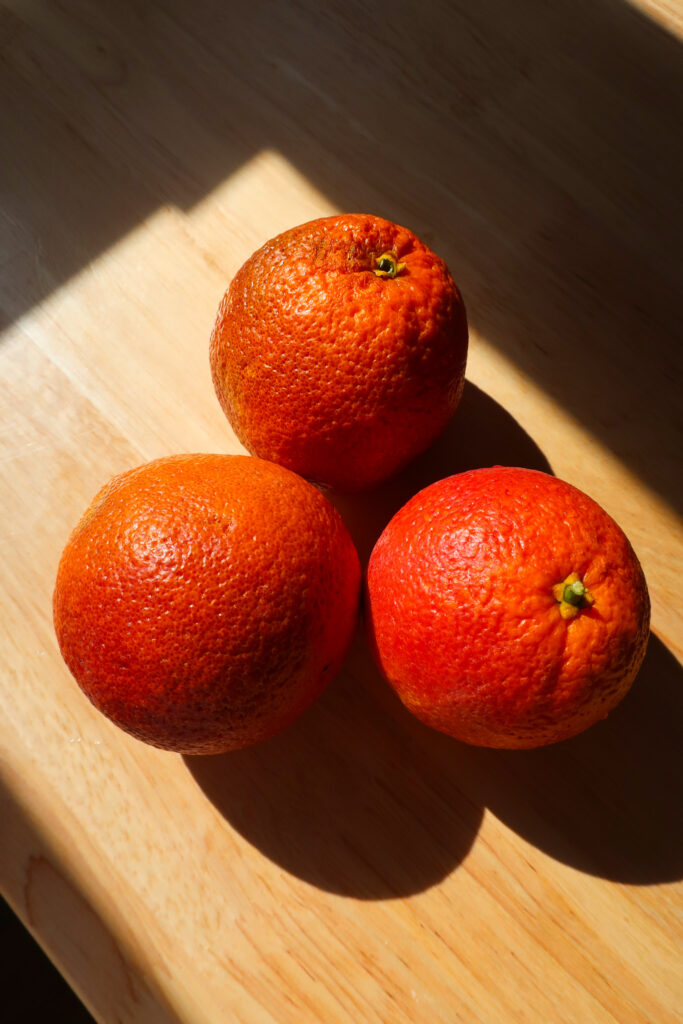
- Blood Oranges: Offers a citrusy-berry tartness to your galette
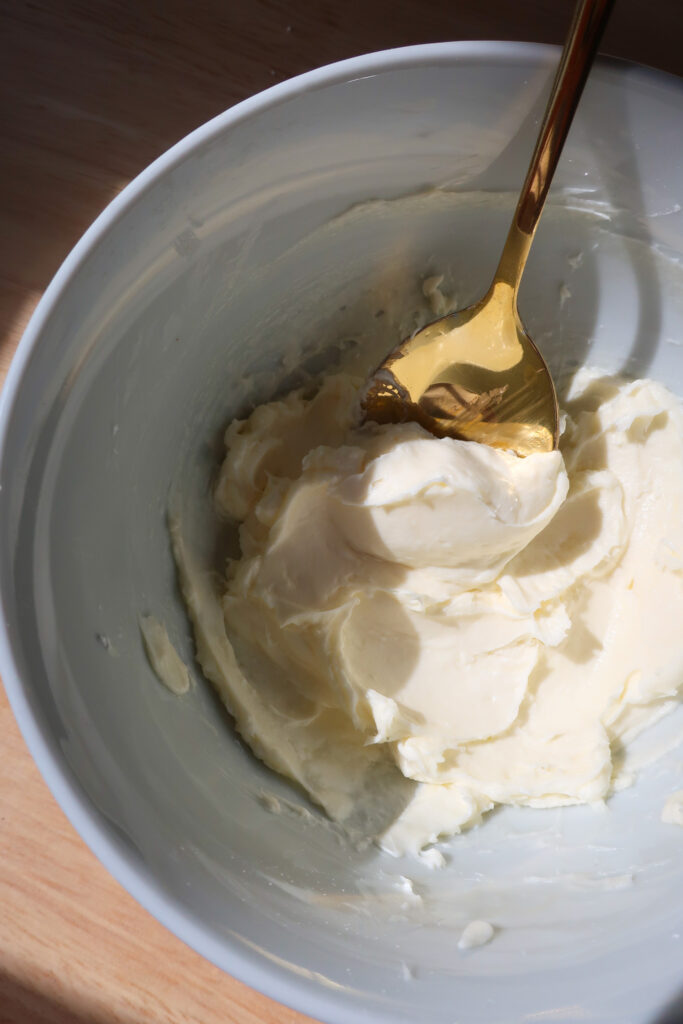
- Cream Cheese: Adds a creamy tang while protecting your crust from forming a soggy bottom
- Powdered Sugar: Light and perfectly blends to sweeten your cream cheese
- Granulated Sugar: The base of your salted caramel
- Heavy Cream: Transforms your caramel into a loose sauce
- Flaky Sea Salt: Adds that salty flavor while leaving a little crunch
I can’t find blood oranges. Can I use another type of orange? Yes! The blood orange is a beauty when cut open, but so is any orange! You need almost a full bag, so grab any variety or mix and match to your heart’s content.
HOW TO MAKE A BLOOD ORANGE GALETTE with SALTED CARAMEL
Start by making your pie dough. Stir together your flour and salt in a bowl and use two butter knives, held against each other with one in each hand, to form an “X,” to cut your butter into your dough. Pull the knives away from each other and back in until you have a sand-like consistency. If you have a food processor, it’s much faster; simply add your ingredients in and pulse. Place a few ice cubes in a glass of water and measure out your water directly into your bowl. Stir together and compress with your hands until you form a dough ball.
To roll your dough, place it between two large pieces of parchment paper and roll it to ⅛” thickness. Check your roll to make sure your dough is an even thickness throughout. Gently peel back the top layer of parchment paper, lay it back onto the dough, flip all of it over, and repeat with the bottom (now top) layer of parchment. Cover your dough with the other piece of parchment paper, and place your flat crust in the fridge for 15 minutes while you prep your filling. It’s important to let your crust chill in the fridge to allow your butter to re-firm ahead of baking in the oven. This crust has a lot of butter in it!
Preheat your oven to 400F while you prepare your fillings. For your cream cheese layer, add your softened cream cheese to a bowl and sift over your powdered sugar. Use a spoon to blend the two together – you can also use a beater, but a spoon will easily do the trick. For your oranges, trim off the top and bottom of each orange – so you can see the inside flesh – and then,
using a pairing knife to carefully cut the skin of the orange, from the orange. Work in a circular motion to trim this off, trying not to cut off any excess “meat.” After you’ve trimmed off the skin, cut each orange into ½” slices – you’ll probably get three to four slices per orange.
If using a rimmed baking sheet, flip your pan over and place it on the counter. Grab your pie dough from the fridge and peel the parchment off the top, then place it onto your baking sheet, parchment side down.
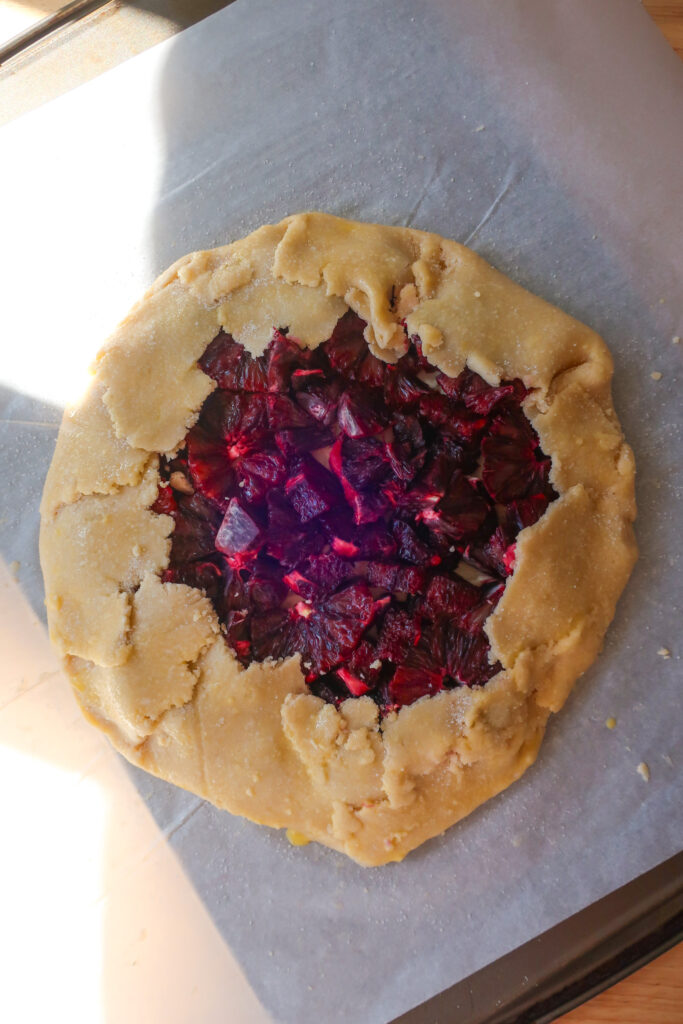
To assemble your galette, in the center of your rolled dough, spread your sweetened cream cheese in a circle, leaving about a 2-inch rim bare. Starting from the outside edge of your cream cheese, lay your orange discs in a spiral until you reach the center. If some of your discs fall apart, no worries! Just use those pieces to fill in any gaps. Carefully fold your crust over the edge of your oranges, leaving the middle open. As you fold it in, work in a circle to fold one section over the next so you don’t have any gaps. If your dough cracks a little, just pinch it together. Make your egg wash by whisking together your egg and a splash of milk or water until combined. Brush your crust with your egg wash and sprinkle it with coarse sugar.
Bake your galette for 40-45 minutes until it is golden brown along the edges. Remove from the oven and allow to cool on the pan for 15 minutes.
While your galette cools, make your salted caramel by combining your sugar and water in a big pot. Use the end of a spoon or a spatula to gently cover all the sugar with the water. It should look like wet sand. Pour your heavy cream into a separate small pot. Place your pot with water and sugar on the stove over high heat. Do not stir! When your sugar-water mixture starts to turn lightly brown (straw-colored) around the edge, place your pot with heavy cream on another burner over med-high and heat until steaming. Don’t leave your sugar mixture unattended. As it turns light brown, you’ll see it start to brown around the edges. With your pot flat on the stovetop, lightly swirl it to move the browning around to evenly color your liquid. Once it is the color of light wood, immediately remove it from heat (it will continue to brown in the pan) and place it on your counter. Carefully stream your hot heavy cream into your browned sugar/water pot. It will bubble, so allow the bubbles to subside before continuing. Drop in one piece of your lightly softened butter at a time, whisk in, and repeat until all is incorporated. To finish, whisk in your flaky sea salt and allow to set for 5 minutes before drizzling over your galette.
3 reasons you’ll love this pastry
TIPS & VARIATIONS
- If you can’t find blood oranges, don’t worry! Simply swap in your favorite oranges and follow the same steps as below.
- You can bring the dough together using your hands or butter knives, but I won’t lie, I use a food processor nowadays to save time. If you have a food processor, pulse together your flour and salt before adding in your cubed cold butter. Pulse until combined, and then add in your cold water and give a few more pulses. Pour into a large bowl and press the dough together with your hands to form a ball. Ever since I started using my food processor for dough making, I rarely go back to doing it manually, as it saves so much time!
- This crust has a lot of butter; it’s crucial that you place it in the fridge before you assemble and bake it so you don’t risk your butter melting out of your crust as soon as it hits the oven.
- Make sure your dough is no thicker than ⅛”; if it’s too thick, it will be overwhelming and likely won’t bake properly in the time allotted. Also, be sure not to roll it too thin, or it will be harder to handle and will likely burn
- Do not stir your caramel while it is cooking! This is a wet caramel, where the sugar is dissolved in water; stirring it while cooking will cause it to crystallize. Just keep a close eye on it
- As soon as your caramel reaches a light brown color, remove it from the heat immediately. It will continue to cook a little in the pan and will further darken
- You may have some salted caramel left over. Store in an airtight jar and keep in your fridge for up to a month! Drizzle over ice cream or brownies or right into your mouth. No judgment here.
MAKING AHEAD & STORING
You can make your pie crust dough in advance. Once made, flatten it into a disc and wrap it tightly in plastic wrap. It will keep in the fridge for two to three days or up to three months in the freezer.
Once your galette is completely cool, store it airtight in the fridge for three to four days. I prefer my sweet galettes and pies at room temperature. If you do as well, just take out a slice and leave it at room temperature for 20 minutes to “warm” up.
MORE PASTRY RECIPES
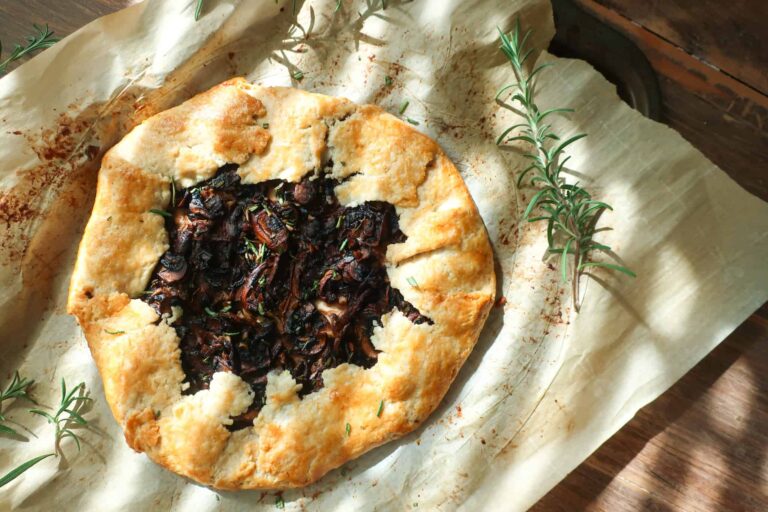
For a savory option, try my Simple Mushroom & Rosemary Galette to pair with this sweet one. Want to try your hand at puff pastry? Make my grandmother’s classic Lovely Lady Locks made with horns of puff pastry filled with sweet cream.
Equipment
- Mixing Bowls
- Butter Knives or Food Processor
- Parchment Paper
- Rolling Pin
- Baking Sheet
- Knife
- Cutting Board
- Spoon
- Measuring Cups
- Measuring Spoons
- Medium Pot
- Small pot
- Fine Mesh Sieve
Ingredients
- 2 cups flour
- ¾ tsp salt
- ¾ cup unsalted butter cold and cubed
- 4 tbsp cold water
- Egg for egg wash
- Course sugar for crust topping
- 7-8 blood oranges
- 3 oz cream cheese softened
- 1 tbsp powdered sugar sifted
- ¼ cup granulated sugar
- 1 tbsp water
- 3 tbsp heavy cream
- 1 tbsp unsalted butter slightly softened
- ⅛ tsp flaky sea salt
Instructions
- In a bowl, stir together your flour and salt. Using two butter knives, held against each other with one in each hand to form an “X,” cut your butter into your dough, with the knives pulling away from each other and back in, until you have a sand-like consistency
- Add in your water (I like to put a few ice cubes in a glass before filling it with cold water to make sure it’s extra cold), stir together, and then compress the dough into a ball. See notes below if you have a food processor!
- Place your dough ball between two large pieces of parchment paper and roll it to ⅛” thickness, making sure your dough is an even thickness throughout.
- Gently peel the parchment back from the top layer, lay it back onto the dough, flip all of it over, and repeat with the bottom (now top) layer of parchment.
- Cover your dough with the other piece of parchment paper and place your flat crust in the fridge for 15 minutes while you prep your filling
- Preheat your oven to 400F
- Add your cream cheese to a bowl and sift in your powdered sugar. Use a spoon to blend together
- Trim the top and bottom off of each orange, then, using a pairing knife, carefully cut the skin of the orange (including the pith, aka the white stuff) from the orange. Work in a circular motion to trim this off, trying not to cut off any excess “meat”
- Once trimmed, place your oranges on their sides and cut into ½” discs
- Remove your dough from the fridge, peel the parchment off the top, and place onto your baking sheet, parchment side down
- To assemble for baking, spread your sweetened cream cheese in a circle in the center of your rolled dough, leaving about a 2-inch rim (where you don’t spread the cream cheese). Starting from the outside edge of your cream cheese, lay your orange discs in a spiral, with one edge slightly on top of the next, until you reach the center
- Carefully fold your crust over the edge of your oranges, leaving the middle open. As you fold it in, work in a circle to fold one section over the next so you don’t have any gaps. If your dough cracks a little, just pinch it together
- In a bowl, whisk together your egg and a splash of milk or water until combined. Brush your crust with your egg wash and sprinkle with coarse sugar
- Bake for 40-45 minutes until it is golden brown along the edges. Remove from the oven and allow to cool on the pan for 15 minutes
- While your galette cools, make your salted caramel by combining your sugar and water in a big pot. Use the end of a spoon or a spatula to gently cover all the sugar with the water. It should look like wet sand. Make sure no sugar is stuck on the sides of the pot (not in the water), or it will burn
- In another small pot, add your heavy cream
- Place your pot with water and sugar on the stove over high heat. Do not stir!
- When your sugar-water mixture starts to turn lightly brown (straw-colored) around the edge, place your pot with heavy cream on another burner over med-high and heat until steaming
- Keep a close eye on your sugar/water mixture as it turns light brown. Once you see brown around the edges, keeping your pot flat on the stovetop, lightly swirl it to move the browning around and evenly color your liquid. Once it is the color of light wood, immediately remove it from heat (it will continue to brown in the pan) and place it on your counter.
- Carefully stream your scaling heavy cream into your browned sugar/water pot. It will bubble, so allow the bubbles to subside before continuing.
- Add in one piece of your lightly softened butter at a time, whisk in, and repeat until all is incorporated
- Sprinkle in your sea salt, whisk in
- Allow to sit for 5 minutes before giving a quick whisk and drizzling over your galette
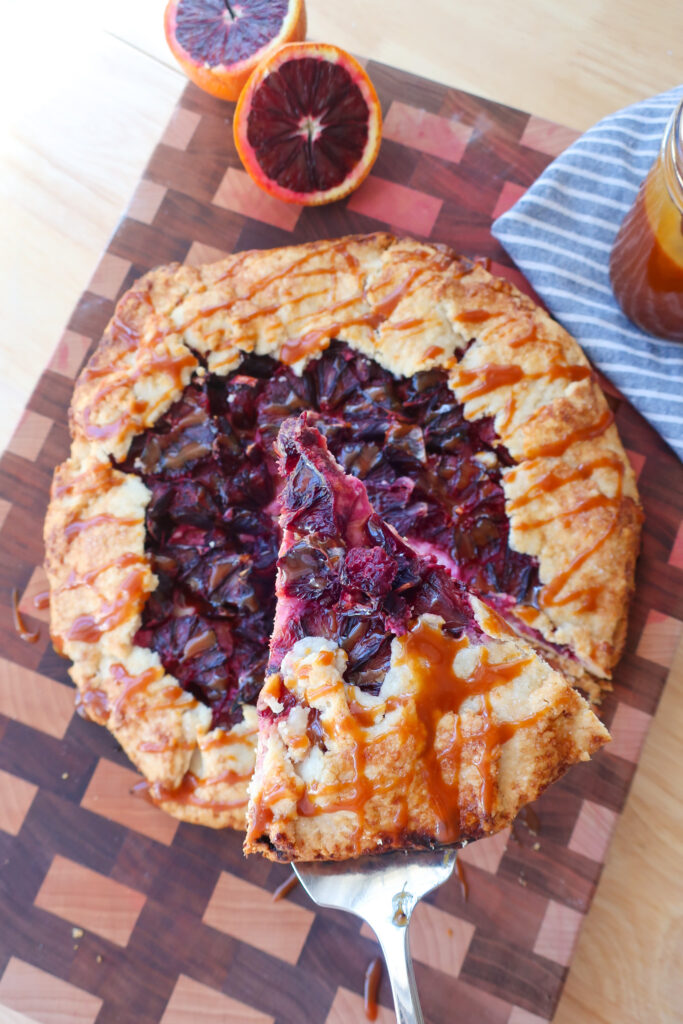
- Slice and enjoy!


This recipe is amazing and worth all your time! The flaky pastry with the sweet tangy filling makes this galette exquisite . The light touch of salted caramel drizzle adds to the flavor in a delicious way! Highly recommend making this!
Glad you loved it Amy!
A winner!
Thank you!