Easy Red Velvet Cake Pops with White Chocolate Drizzle
I love red velvet cake. Between that, with cream cheese frosting (of course), and my favorite chocolate cake with vanilla buttercream – those two cakes tie for my absolute all-time favorites. When I was testing my red velvet cake recipe, the cake I made before I made the final adjustments was usable but not right. I didn’t want to waste it though so I thought, “I’ll make cake pops with this!”
I ended up crumbling it and freezing it until about a week later when I made these delicious beauties. I’d seen someone on TikTok make flat-circled cake pops and was delighted by this shape (she also timed the difference between doing circle cutouts versus rolling them into balls and the cutouts took the cake!). So taking my cue from her, I rolled my dough flat, cut, and drizzled – I tell ya, getting cake pops on a stick, cleanly dipping the full pop, and keeping it in-tact on the stick feels like absolute wizardry and I can never get it to work. Flat sheet cake pops it is!


WHAT IS A CAKE POP?
A delicious little bit of magic that comes together so simply – making it one of my favorite desserts! Depending on the cake you’re using, cake pops are made from a crumbled cake mixed with frosting and then formed into your desired shape, most often balls. You then can insert a lollipop stick into the center and dunk it in melted chocolate, skewering the stick into a box or styrofoam to let the chocolate dry without getting smudged. Or just leave them shaped and top as desired, no stick is required. You can top them with all kinds of yummy things, from extra cake crumbles, sprinkles, oreo bits, nuts, and more!
How do I get my cake pops to not crumble when I roll them? There are two key factors to getting those smooth and moist pops. One is the amount of frosting you incorporate into your cake crumbles. You want your dough to squish through your hands almost like Play-Doh. Secondly, after you’ve mixed your dough, wrap it tightly and place it in the fridge for 30 minutes. This will allow any dry crumbles to absorb that moisture and your cake to relax, helping with a smooth roll-out and shaping!


INGREDIENTS
- Flour: Provides structure to your cake
- Granulated Sugar: Gives both sweetness and aids in the final texture of your cake
- Unsweetened Cocoa Powder: Just a little to give the hint of a chocolate taste
- Baking Powder & Baking Soda: Key leavening agents for the rise of your bake
- Salt: Balances and enhances flavors
- Buttermilk: Assists in both the rise and final texture of your red velvet cake
- Canola Oil: Provides fat and moisture for a soft cake that doesn’t dry out and also loosens the white chocolate making it easier to drizzle and softer to bite into
- Egg: Also helps with the final, soft texture of the cake
- Vanilla Extract: A subtle flavor add to both your cake and frosting
- White Vinegar: Helps activate the baking soda for added fluffiness
- Red Food Color: To get that signature “red velvet” color
- Boiling Water: The secret ingredient to a moist cake
- Cream Cheese: The base for your cream cheese frosting
- Salted Butter: Helps to balance the cream cheese to make a perfectly smooth frosting
- Milk: Loosens your frosting to make it more spreadable
- Powdered Sugar: The fine texture blends seamlessly into the frosting
- White Chocolate: A creamy, drizzled balance to the cake “pops”
Can I use my own cake for this? Absolutely! This cake pop recipe uses one 9-inch baked red velvet cake, so if you already have one on hand, go for it. If you have two, simply double the amount of frosting you add as well as the white chocolate drizzle.
HOW TO MAKE RED VELVET CAKE “POPS”
If you don’t already have a cake and frosting prepared and you’re making the below cake recipe, start by preheating your oven to 325F and greasing a 9-inch round cake pan before lining the bottom with parchment paper.
For your cake, whisk together the flour, sugar, cocoa powder, baking powder, baking soda, and salt in a large bowl. In a separate bowl, whisk together your buttermilk, oil, egg, vanilla, vinegar, and food coloring. Add your dry ingredients to your bowl with your wet and whisk until mostly combined. Carefully pour in your boiling water and gently whisk until incorporated. Your batter will be runny, it’s ok! Add it to your prepped cake pan and bake on the middle rack of your oven for 35-38 minutes, or until you insert a toothpick and it comes out clean. Remove the cake from the oven and allow it to cool in the pan for 10 minutes.
To begin crumbling your cake for the “pops,” add your cake to the bowl of a stand mixer and start on the lowest speed to crumble your cake, working your way up to a medium-low speed. You can also use your hands for this but if working with the cake almost directly out of the oven, the mixer will help to break it more quickly (since your cake will still be hot) and the moisture from the fresh bake will soften your soon-to-be-dough easier in a mixer. Regardless of doing this with a mixer or by hand, make sure to break up any clumps, you want your crumbles fine!
For your cream cheese frosting, use a hand mixer to beat together your cream cheese and salted butter in a bowl until smooth. Sift in your powdered sugar, mix, and add your vanilla and milk, beating until fully combined.
To make your cake “pop” dough, first, reserve a tablespoon of your cake crumbs and set aside for decorating later. Add half of a cup of your cream cheese frosting to your mixer with the cake crumbles and mix completely. Depending on when you make your “pops” will depend on how much frosting you need to add. After the frosting is mixed in, squeeze your dough together, if it holds without crumbling you don’t need any more frosting, you should be able to squish it together almost like Play-Doh. If it seems a little dry, add in more frosting, a fourth of a cup at a time, until you get the desired consistency. Wrap your dough airtight in foil and place in the fridge to cool for 30 minutes.
To shape and decorate your cake pops, roll your dough between two sheets of parchment paper to ½-inch thickness. Use a 2-inch round cookie cutter and cut out 25 circles, re-rolling the dough as needed. Re-use the parchment you rolled your dough in and lay them out in one layer across the sheet. After your shapes are cut, pour your white chocolate and canola oil into a microwave-safe glass or pitcher and microwave for 30 seconds. Stir, and return for another 15 seconds, stir, and repeat in 15-second intervals until your chocolate is smooth and completely melted. Using a fork, drizzle your white chocolate over all your cake “pops” and quickly sprinkle with a few crumbles before the chocolate starts to dry. Let the cake “pops” to set for at least 10 minutes or until the chocolate has fully hardened and enjoy!


3 reasons you’ll love this dessert
TIPS & VARIATIONS
- Depending on your cake, you will need less or more frosting to get it to the right dough consistency. If it seems crumbly or too dry, just add a few tablespoons at a time until you get it there. It’s better for the dough to be on the softer side than too dry which will result in it crumbling when you try to roll it
- You can make any size or shape cake “pop” that you like. I used a 2-inch circle cutter but feel free to cut as you please
- If you prefer a different chocolate to white chocolate or want to try other toppings, go for it! Depending on the type of chocolate you use, you might not need to thin with the oil.
- The recipe is if you want to make your own cake and cream cheese frosting from scratch, if you already have a cake in mind, skip the instructions for making the cake and frosting and proceed to form your “pops” and white chocolate drizzle. Note that this recipe uses one, 9-inch cake round so if you have more than that, adjust accordingly
MAKING AHEAD & STORING
- You can make your cake in advance and store it airtight in the freezer for 2-3 months, or it will keep in the fridge for 4-5 days. You can do the same with the cream cheese frosting, storing it in the freezer for up to 3 months and in the fridge for up to 2 weeks.
- Once assembled, the cake “pops” themselves will last at room temperature for 3-4 days or you can freeze them for up to three months. Remove them from the freezer and allow them to come to room temperature before eating for the best bites!
MORE MINI DESSERT RECIPES
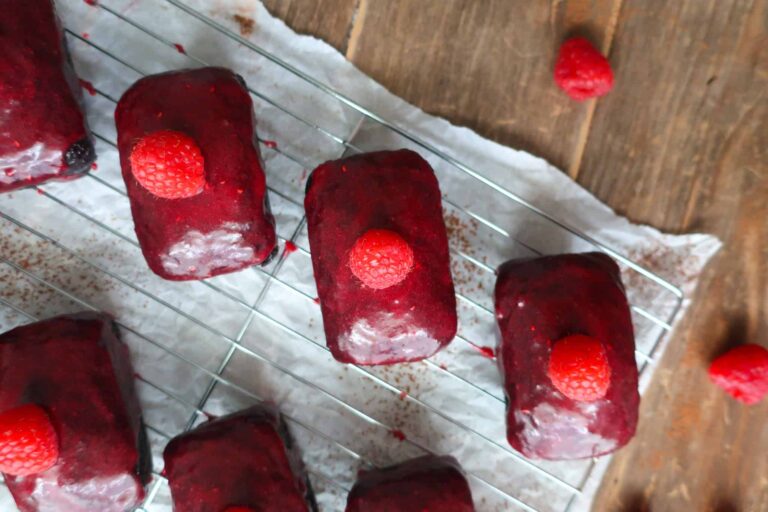
These Mini Chocolate Cakes with Raspberry Glaze are the perfect little bites made up of my favorite chocolate cake. If you’re looking for something fruity, try these Mini Fruit Tarts which you can easily make year-round with seasonal fruit. Or, try my Single-Serve Key Lime Pie, need I say more?

Equipment
- 9-inch Round Cake Pan
- Mixing Bowls
- Spatulas
- Whisk
- Measuring Cups
- Measuring Spoons
- Hand Mixer
- Fine Mesh Sieve
- Pot
- Wire Rack
- Parchment Paper
- 2-inch round cookie cutter
- Fork
- Microwave safe glass or pitcher
Ingredients
- 1 ½ cups all-purpose flour
- 1 cup granulated sugar
- 1 ½ tbsp unsweetened cocoa powder
- ½ tsp baking powder
- ¼ tsp baking soda
- ½ tsp salt
- ½ cup buttermilk room temperature
- ½ cup canola oil
- 1 large egg room temperature
- 1 ½ tsp vanilla extract
- 1 ½ tsp white vinegar
- 1 tbsp red food coloring
- ½ cup boiling water
- 3 oz. cream cheese room temperature
- 6 tbsp salted butter room temperature
- 1 tsp vanilla extract
- 1 tbsp milk
- 3 cups powdered sugar
- 1 cup white chocolate
- 2 tsp canola oil
- 1 tablespoon red velvet cake crumbles reserved
Instructions
- Preheat oven to 325°F. Grease and line the bottom of a 9-inch round cake pan with parchment paper
- In a large bowl, whisk together the flour, sugar, cocoa powder, baking powder, baking soda, and salt
- In a separate bowl, whisk together your buttermilk, oil, egg, vanilla, vinegar, and food coloring
- Pour your dry ingredients into the bowl with your wet and whisk until mostly combined and then carefully pour in your boiling water, whisking until smooth. The batter will be a little runny, don’t worry!
- Pour the batter into the lined cake pan and bake on the middle rack for 35-38 minutes, or until a toothpick inserted comes out clean
- Allow the cake to cool in the pan for 10 minutes before removing and transferring to a mixing bowl
- You can use a stand mixer, starting off low and working towards a medium-low speed to break up your cake into crumbles or use your hands. Make sure to break up any cake clumps, you want your crumbles fine.
- Make your cream cheese frosting in a medium bowl with a hand mixer by beating together your cream cheese and salted butter until smooth. Then sift in your powdered sugar, mix, and add your vanilla and milk, beating until fully combined
- Reserve a tablespoon of your crumbs before adding half a cup of your cream cheese frosting and mix it in completely. Squeeze your dough together, if it holds without crumbling you don’t need any more frosting, you should be able to squish it together almost like Play-Doh. If it seems a little dry, add in more frosting, a fourth of a cup at a time, until you get the desired consistency
- Place your mixture into a ball on a piece of foil and wrap tightly before placing it in the fridge to cool for 30 minutes. This will make it easier to roll and cut your dough as well as help give your cake “pops” a smooth finish
- Once chilled, roll your cake pop dough between two sheets of parchment paper to ½-inch thickness. Use a 2-inch round cookie cutter and cut out 25 circles, re-rolling the dough as needed. Lay them out in one layer across a sheet of parchment paper (I just re-used the ones I rolled them in between)
- Once you’ve cut out all of your shapes, pour your white chocolate and canola oil into a microwave-safe glass or pitcher and microwave for 30 seconds. Stir, and return for another 15 seconds, stir, and repeat in 15-second intervals until your chocolate is smooth and completely melted
- Using a fork, drizzle your white chocolate over all your cake “pops” and quickly sprinkle with a few crumbles before the chocolate starts to dry. Allow the cake “pops” to set for at least 10 minutes or until the chocolate has fully hardened and enjoy