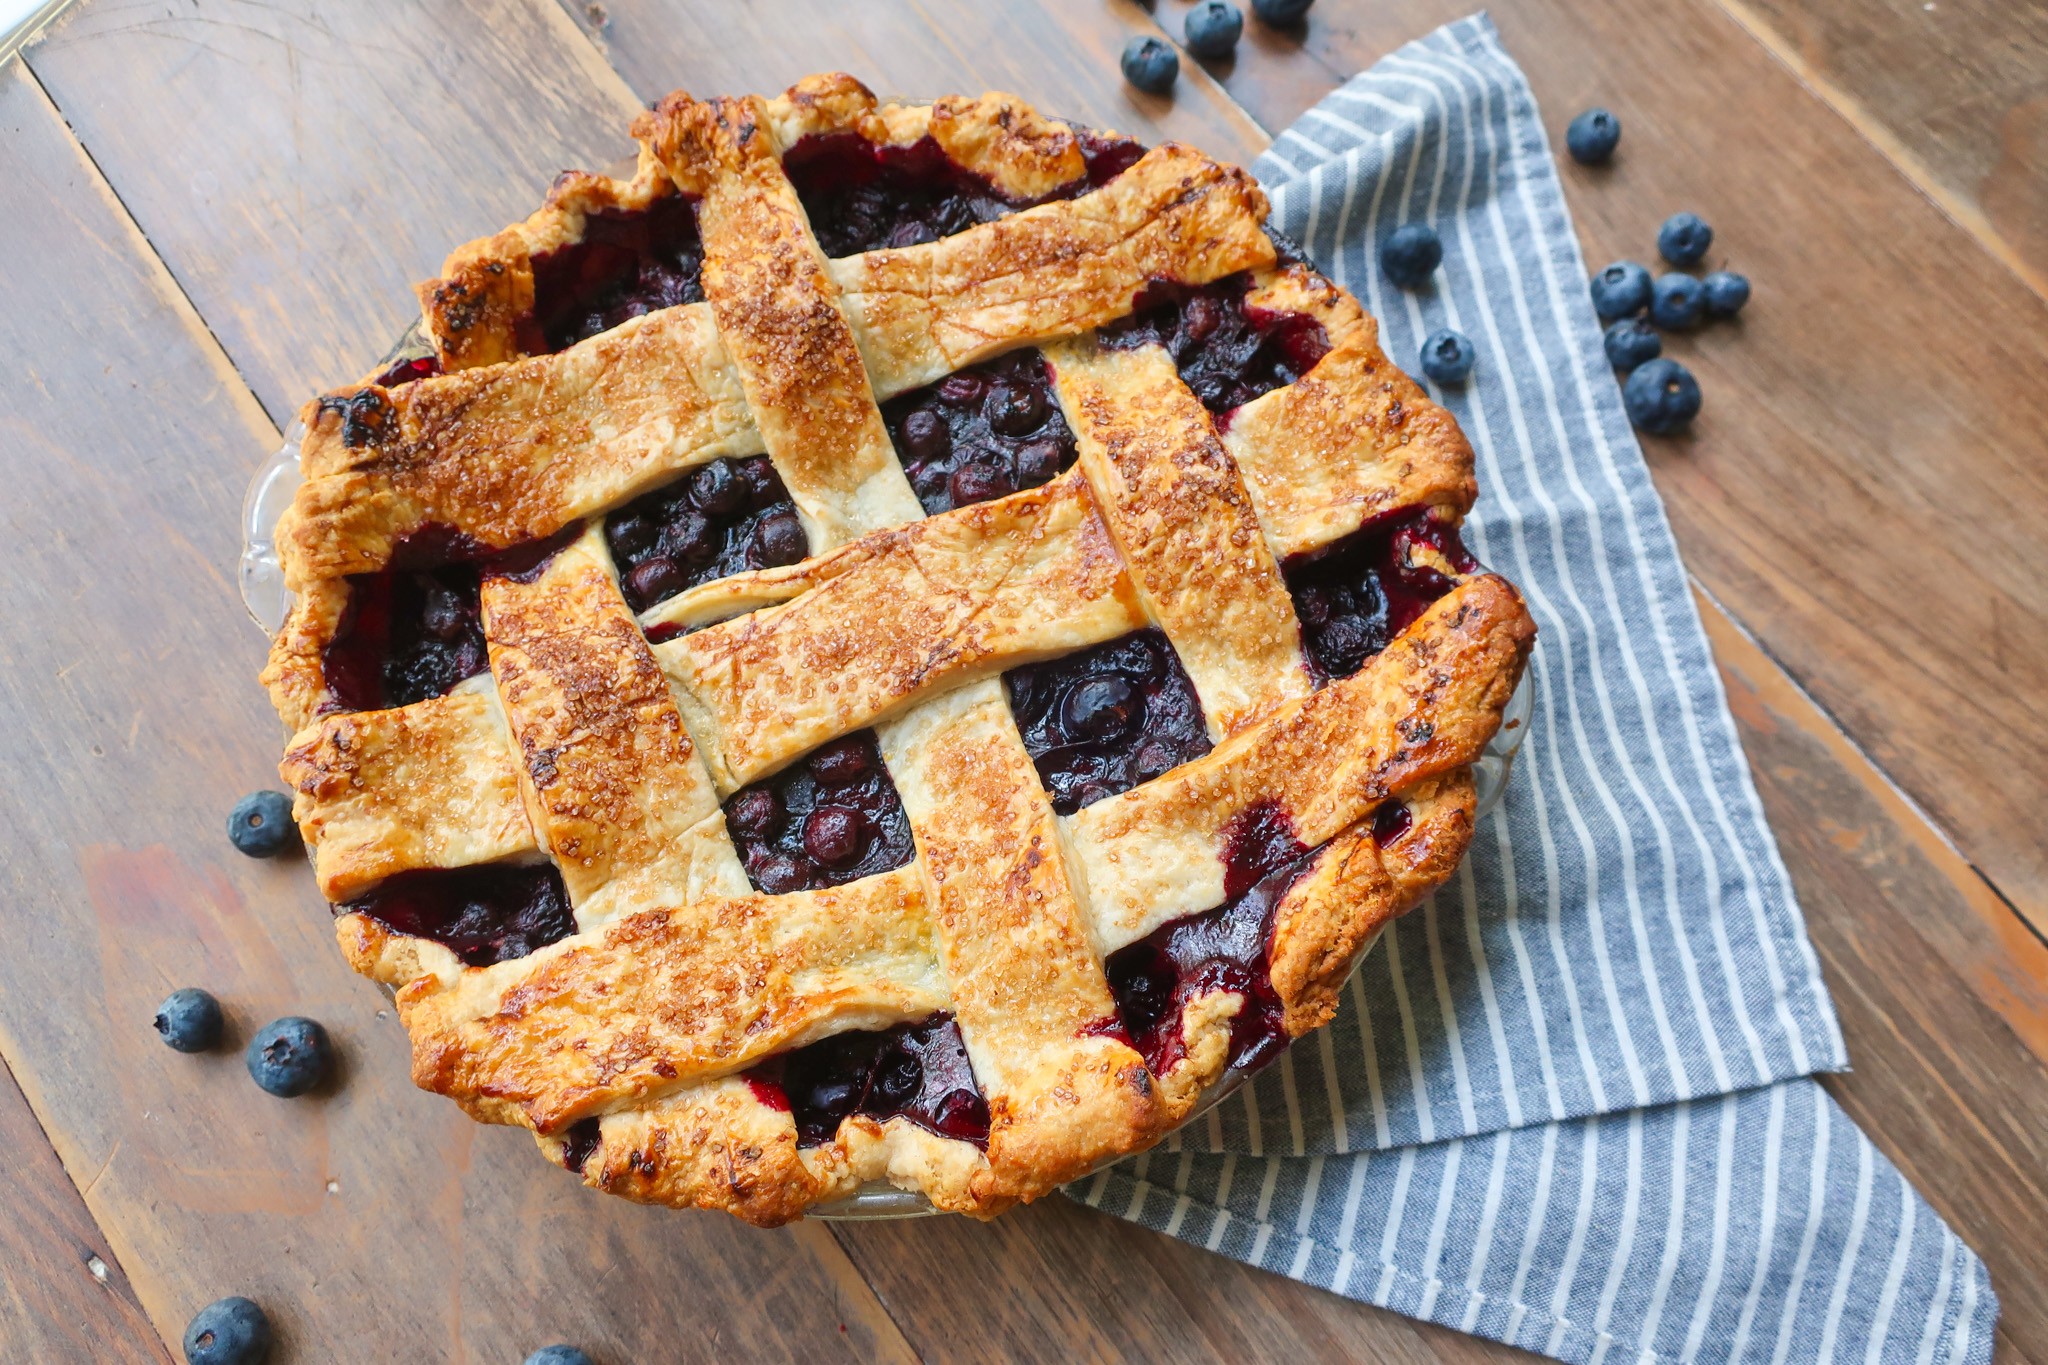
Ryan’s Homemade Blueberry Pie
I will repeat it until the cows come home: I am a pie fanatic. From a classic cherry pie to one pie filled with four fruit flavors, I can’t get enough of that buttery, flaky crust. So, for my brother Ryan’s 41st birthday, I’m making his favorite: homemade blueberry pie.
Now, it always shocked me into disbelief that he never liked chocolate. Being the charming little sister that I was, whenever I would give him snacks, I’d always try to sneak in a chocolate bite (because what is cookie dough without the chocolate chips??). He always caught me, though, cause I really wasn’t that sneaky. No chocolate is being snuck in here, just fresh summertime blueberries (though you can use frozen!), and a good old-fashioned, butter-based pie crust.
One day in the (near) future, when I pull in the website traffic for accent golden to have advertisements. I plan to donate the ad revenue from this page to the Muscular Dystrophy Association. Until then, if you’re looking to do some charitable giving, I highly recommend checking out the MDA. They do so much amazing work around scientific research and access to care, in addition to supporting families with one of the many neuromuscular diseases.
Ryan LOVED his trips to summer camp, where other kids like him were able to be themselves and have an amazing summer camp experience. “Each camp includes dedicated volunteer health professionals and trained camp volunteers who meet every child’s medical and physical needs. This team assumes all camper care, including physical and emotional support, providing parents with the opportunity for respite.”
If you love this blueberry pie, please rate and review it below and tag @accentgolden in your posts on social!


HOMEMADE BLUEBERRY PIE
Between you and me, I often find blueberry pie to be too sweet. Between the blueberries and the sugar, it can be too much for me. For my take on a classic blueberry pie, that’s not the case. We’re balancing the juicy sweetness of fresh blueberries with a touch of lemon juice, not for any lemon flavor but for that tart balance. Which turns it into the best blueberry pie filling paired with a delicious butter crust.
The crust itself is only four ingredients (including water) and comes together easily in a bowl or food processor. I love a lattice crust – that basketweave-style – on top of a pie. It just screams classic, ya know? But you can also do a full cover top crust, cut shapes into your dough, really whatever you please. Just make sure to cut some ventilation holes so the filling can breathe naturally while it bakes.
Once I finished this recipe, I literally told my mom, “I just made the best pie of my life.”
How thin should I roll my pie crust? I like my pie dough rolled to ⅛” thickness. This may sound thin, but truly, once you measure it, you’ll realize you may have been rolling your dough that thin all along. Rolling your dough on the thinner side helps give you that flakiness and a more even bake.


INGREDIENTS
- Flour: Provides structure to your crust
- Butter: To bind your pie crust while bringing the flake and the flavor
- Water: Cold to bring your crust together (without melting it)
- Granulated Sugar: For the right amount of sweetness and to thicken your filling
- Salt: To pop and balance flavors
- Cinnamon: For the best cozy spice
- Blueberries: Fresh works best, but frozen will do (see tip section for details)
- Lemon Juice: To help thicken your filling while balancing out the sweetness
- Egg: Whisked together with milk or water to be brushed on top, giving your crust that golden shine
- Coarse Sugar: Optional, but who doesn’t want a crunchy sugar top crust??
Why doesn’t the blueberry pie filling need to be pre-cooked? For this pie, it’s not necessary. By not cooking your blueberry filling in advance, you’re blueberries will keep their shape more as they bake for the best bite. The filling itself will also thicken as it bakes in the oven, so cooking it twice isn’t necessary. Plus, it makes this pie come together even faster!
HOW TO MAKE HOMEMADE BLUEBERRY PIE
Lightly grease a 9 ½” pie dish. For your crust, stir together your flour and salt in a large bowl. Add your cold, cubed butter to the bowl. Either use two knives to chop the butter into your flour or rub it in with your hands (you can also throw it all in the food processor if you have one). Once your mixture resembles coarse crumbles, stir in your cold water and start to compress the dough into a ball.
Since this dough will make a top and bottom crust, use a knife to cut it in half. Roll one of your halves between two sheets of parchment paper until ⅛” thick. Peel back the parchment paper from the top, place it back on, flip over, and remove that layer of parchment paper completely. Transfer your rolled dough to your pie dish, lifting and shifting as needed to sit it evenly in the dish. If you have more than an inch of overhang of dough, cut it off and set it aside. Tuck your dough under the rim along the edge to form your crust. Crimp the dough using a peace sign on one hand and your pointer finger from your other hand.
Place your pie dish with the crust in the fridge to chill and roll out the other half of the dough. Place the rolled-out dough in the fridge as well. Chill for 20 minutes.
Preheat your oven to 425°F while you make your homemade blueberry pie filling. Stir your sugar, salt, flour, and cinnamon together in a bowl. Add in your washed blueberries and stir to combine.
Once chilled, remove your pie crust from the fridge, and pour in your blueberry filling. Dot the top with your cold butter. Remove your rolled crust from the fridge and use a pastry wheel or pizza cutter to cut 6 even strips. Lay 3 of those strips vertically along the top of your dough, with about an inch of space in between. Then weave, one strip at a time, your remaining three strips over and under the vertical strips. Starting under the first row, and over the next row to create that lattice top.
Crack your egg into a bowl with a splash of milk or water and whisk together. Brush your egg wash over the top of your lattice and along the edge of your pie. Sprinkle with coarse sugar.
Place your pie onto the middle rack of your oven, with a baking sheet on the rack below underneath your pie to catch any drips. Bake for 20 minutes, then, with the oven closed, drop the temperature to 375°F for an additional 40-45 minutes. Your filling should be bubbling, and your crust will be a deep golden brown.
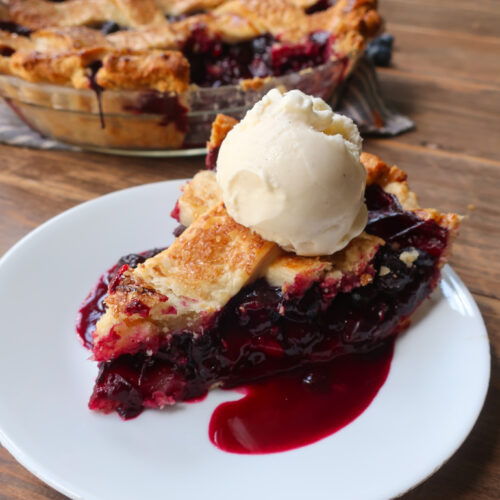
Remove from the oven and allow to cool for 4 hours or longer (overnight is even better!). Then slice and enjoy!


3 reasons you’ll love this pie
TIPS & VARIATIONS
- You can use a food processor for your pie crust. Just throw in everything except the water, pulse until coarse, and add in your cold water. Pulsing again until combined. From there, I dump my dough into a bowl and press it together with my hands before rolling it out.
- Feel free to add additional spices as you please: nutmeg, cardamom, or maybe some fresh herbs would all be delicious!
- For frozen blueberries, do not thaw them in advance! Throw in as is, but note that the pie will take longer to bake than mentioned below. Just look out for that bubbly, overflowing filling and a deeply golden crust.
- Place a baking sheet on the rack below your pie! Trust me, you don’t want to be cleaning up blueberry filling that burned to the bottom of your oven.
- Keep an eye on your crust! If halfway or two-thirds of the way through, it’s browning too quickly, tent it with foil for the rest of the bake.
MAKING AHEAD & STORING
I would recommend making this pie a day before you plan to eat it. Hard, I know, to pass a baked pie on the counter, but this baby is juicy. Giving the pie time to set will allow your filling to hold better in every slice. Plus, pie always tastes better the next day, once the flavors have time to chill together.
You can prep your pie crust dough 2-3 days ahead of time as well. Wrap it airtight and store in the fridge if you plan to do this.
Once baked, your homemade blueberry pie will last wrapped at room temperature for up to 2 days or in the fridge for up to 5 days. You can also tightly wrap your baked pie and store it in the freezer for up to 4 months. If eating from frozen, place the pie in the fridge the night before to allow it to thaw, before pulling it out and letting it come to room temperature before serving.
MORE BLUEBERRY RECIPES
If you’re like me and often can’t be bothered to scoop batter into individual muffin tins, you have to make this Blueberry Muffin Bread. The most tender blueberry-muffin-esque bake topped with a buttery spiced crumble, all baked in a loaf pan. But, if you’re feeling a muffin, these Blueberry Chai Muffins are it and are packed with all the cozy spices. Looking for more of a tart than a pie? Try my Blueberry Tart, packed with all the juicy freshness but tart-style.
Equipment
- 9 ½” pie dish
- Rolling Pin
- Parchment Paper
- Spoon
- Mixing Bowls
- Butter Knives or Food Processor
- Measuring Cups
- Measuring Spoons
- Pastry Cutter or Knife
- Pastry Brush
Ingredients
- 4 cups flour
- 1 ½ tsp salt
- 1 ½ cups unsalted butter
- 8 tbsp cold water
- ½ cup granulated sugar
- ¼ cup flour
- ¼ tsp salt
- 1 tsp cinnamon heaping
- 6 cups blueberries
- ¼ cup lemon juice
- 1 tbsp unsalted butter
- 1 egg
- 1-2 tbsp coarse sugar
Instructions
- In a bowl, stir together your flour and salt. Using two butter knives, held against each other with one in each hand to form an “X,” cut your butter into your dough, with the knives pulling away from each other and back in, until you have a sand-like consistency.
- Add your water (I like to put a few ice cubes in a glass before filling it with cold water to make sure it’s extra cold), stir together, and then compress the dough into two even balls. See the tip section if you have a food processor!
- Place one of your dough balls between two large pieces of parchment paper, and roll to ⅛” thickness, making sure your dough is an even thickness throughout.
- Gently peel the parchment back from the top layer, lay it back onto the dough, flip all of it over, and repeat with the bottom (now top) layer of parchment.
- Removing one side of the parchment, carefully lay that side face down into a 9-inch pie dish and remove the top layer of parchment
- Carefully shift the dough to ensure it is lying flat within the pan and along the sides. If you have more than an inch of excess, use a butter knife to cut away any extra and save it for later.
- Tuck the remaining excess dough under along the edges to form your crust
- Make a peace sign with your pointer and middle fingers on one hand, and place it along the edge of your crust. With the pointer finger of your other hand, pointing toward the center of the peace sign, pull back the dough in the center of your fingers. This will form a crimp. Repeat along the edge of your crust until complete.
- Place your pie dish with the crimped crust in the fridge for 20 minutes
- Roll out your other remaining dough ball – reusing your parchment paper – and place the flat sheet into the fridge to chill
- Preheat your oven to 425°F
- For your filling, in a bowl, stir together your sugar, flour, salt, and cinnamon. Add in your washed blueberries and combine
- Remove your chilled pie crust from the fridge and pour the filling into the dish, spreading evenly. Dot your cubed butter across the top
- With your remaining rolled crust, use a pastry wheel or pizza cutter to cut 6 strips. Lay 3 strips vertically across the top of your filling, about an inch apart. Then, one strip at a time, take one of your remaining strips and weave it over and under the vertical strips, horizontally. Repeat with the remaining strips, leaving an inch of space from one row to the next. If you start your weave under the first strip, for the next row, begin over that first strip
- In a bowl, crack your egg and add in a splash of milk or water. Whisk together to form your egg wash
- Brush your exposed crust with the egg wash and sprinkle with the coarse sugar
- Place a baking tray on the rack below your pie to catch any blueberry drips
- Bake on the middle rack for 20 minutes at 425°F, then, with the oven door shut, drop the temperature to 375°F and bake for an additional 40-45 minutes. The crust should be deeply golden, and the filling will be very bubbly. Keep an eye on your crust; if it starts to darken too early, loosely tent with foil to prevent the top from burning
- Remove and allow to cool for at least 4 hours, preferably overnight. Slice and enjoy!