
Single Serve Lemon Tart with Almond Crust
If you’re looking for a dessert that is just for you and hits those sweet and tart notes, all wrapped in a classic bake… This single-serve lemon tart is the one.
The French-obsessed part of me loves anything pastry. Fun fact, I studied French at the tail end of high school, studied abroad for a semester my junior year of college in Limoges, and was one class away from a minor in French. Am I fluent? Absolutely not. Am I too self-conscious of my pronunciation and competency to ever give myself a fair shot at practice and retention? Sadly, yes.
If you love this recipe, please rate and review it below and tag @accentgolden in your posts on social!
This website uses affiliate links, which may earn commission for purchases made at no additional cost to you.


WHAT IS A LEMON TART?
A lemon tart is a classic French dessert. The base is a crisp pastry crust, filled with a smooth and sharp lemon custard, and baked to set. The tart balances in both flavor and texture: sweet and tart, creamy and firm.
You’ll often find a lemon tart served as is or dusted with powdered sugar. You’re welcome to do that here, though I’ve included an optional small batch of whipped cream if you so please.
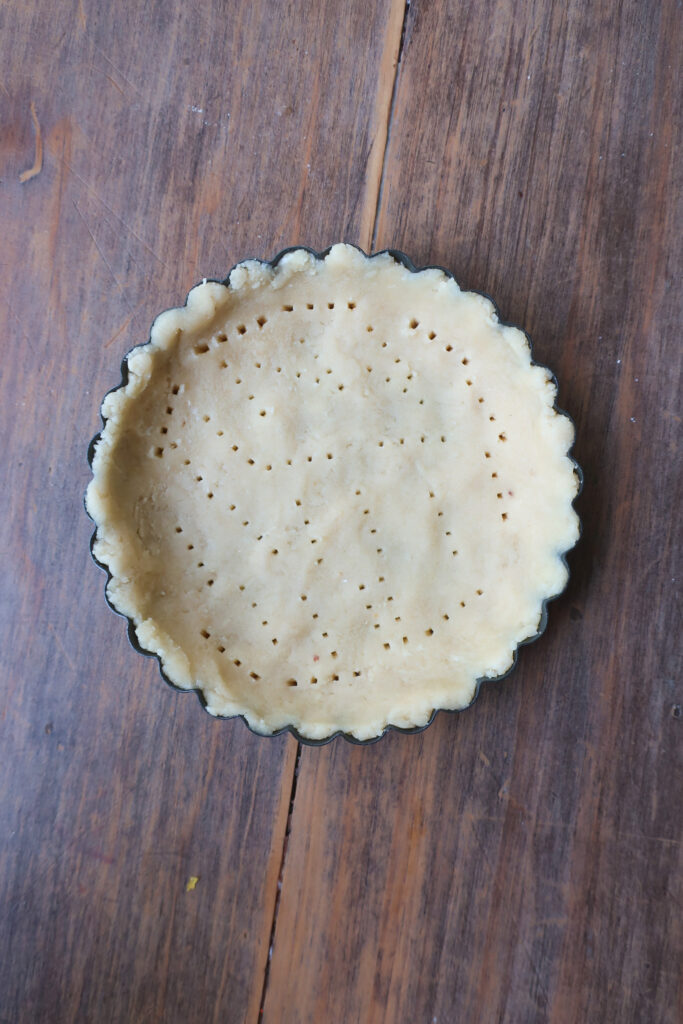
I’m pressing my crust into the pan, but it feels thin… Don’t worry! This recipe makes just the right amount of crust for a 4 or 4 1/2 -inch pan. It will seem a little thin, but once it bakes, it will puff perfectly.

INGREDIENTS
- All-purpose flour & almond flour: form a tender, slightly crumbly crust base
- Powdered sugar: adds sweetness and helps create a delicate texture in both the crust and whipped topping
- Unsalted butter: brings flakiness to the crust and richness to the filling
- Cold water: binds crust ingredients together without melting the butter
- Salt: enhances overall flavor in crust and filling
- Lemon: both the juice and the zest deliver bright, tangy citrus flavor to the filling
- Egg yolk: thickens and enriches the lemon filling
- Granulated sugar: sweetens while balancing tartness
- Heavy cream: adds creaminess to the filling and creates a light texture in the whipped topping
Why is the tart crust baked twice? The first bake helps to set the crust and give it some base color. This will also prevent a soggy bottom once you bake with your filling. Once the lemon filling is added, you’ll return your tart to the oven to bake a final time. This will both cook your filling and give your crust time to get that deep golden color.
HOW TO MAKE A SINGLE SERVE LEMON TART
Begin by lightly greasing a non-stick 4 to 4½-inch tart pan
To make the crust, combine the all-purpose flour, almond flour, powdered sugar, and salt in a small bowl. Add the cold butter and use your fingers to rub it into the dry ingredients until the mixture resembles coarse sand. Pour in the cold water and gently press the mixture together until a dough forms. Press the dough evenly into the bottom and up the sides of the tart pan.
Place your tart pan in the fridge for 10 minutes to chill. Preheat your oven to 350°F.
Remove the crust and prick the base with a fork before baking for 12–15 minutes. The bottom of the crust should be lightly golden, and the edges a deeper golden brown. This is a partial bake, as the crust will return to the oven with the filling.
While the crust bakes, whisk together the fresh lemon juice, lemon zest, egg yolk, granulated sugar, heavy cream, melted butter, and a pinch of salt in a small bowl to make the lemon filling. Pour into the warm, par-baked crust and return it to the oven for another 10–13 minutes. The filling should be just set in the center, with a slight jiggle, as it will firm up while cooling.
Let the tart cool at room temperature for 15 minutes before placing it in the fridge to chill completely for at least 2 hours.
Before serving, whip the heavy cream with powdered sugar until medium peaks form. Dollop or pipe the whipped cream over the chilled tart and enjoy!


3 reasons you’ll love this lemon dessert
TIPS & VARIATIONS
- If you have an almond allergy, just swap in extra all-purpose flour for the ground almonds!
- It’s very important to chill the crust before the initial bake. This will allow the butter to firm up and the crust to keep its shape when baking.
- The first bake is to partially bake the crust, but we are looking for a little more color at the start. Check to make sure the edges look deeper golden in color, while the inside of the crust has a lightly golden tint.
- When checking for doneness of your baked filling, gently tap the side of the pan. There should be a slight jiggle to the center of the tart, once it’s baked. It will firm up more as it cools!
- Garnish your single-serve lemon tart as you like! I topped mine with whipped cream and fresh mint leaves. You can swap the whipped cream for a dusting of powdered sugar and add fresh berries, slivered almonds, or more lemon zest on top!
STORING YOUR SINGLE SERVE LEMON TART
Once baked and cooled, if you have any lemon tart leftover *GASP*, wrap it up tight, and place it in the fridge. The tart will keep for up to three days in the refrigerator.
MORE LEMON RECIPES
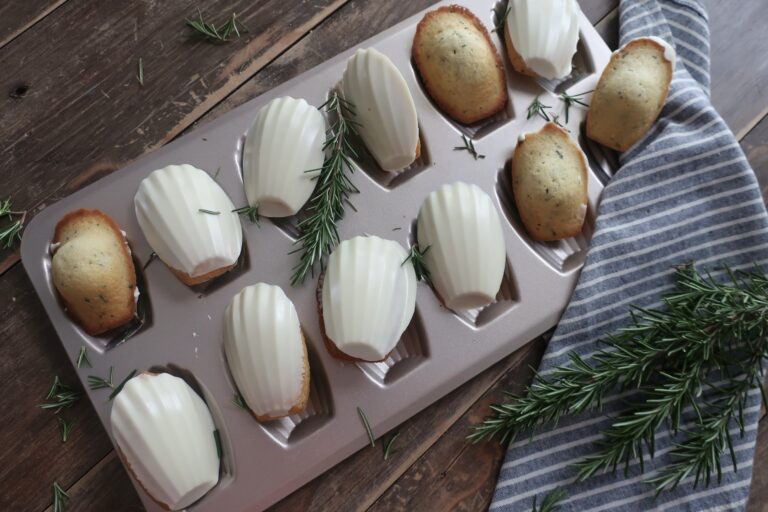
For something quick, easy, and refreshing, try this small batch Lemon Posset, made with only three ingredients! Feeling the French vibe? Try these Lemon Madeleines, finished with a simple lemon glaze. If you’re looking for some brunch inspo, try these Lemon Earl Grey Scones for the perfect treat, topped with a white chocolate lemon glaze.
EQUIPMENT YOU’LL NEED

Equipment
- 4-4 ½” Tart Pan
- Mixing Bowls
- Fork
- Whisk
- Juicer
- Zester
- Measuring Cups
- Measuring Spoons
Ingredients
- 2 tbsp all-purpose flour
- 2 tbsp almond flour
- 1 tbsp powdered sugar
- Tiny pinch of salt
- 1 tbssp cold unsalted butter cut into small pieces
- ½ tsp cold water
- 1 tbsp fresh lemon juice
- ½ tsp lemon zest
- 1 egg yolk
- 1½ tbsp granulated sugar
- 1 tsp heavy cream
- 1 tsp butter melted
- Tiny pinch of salt
- ¼ cup heavy cream
- 1 tsp powdered sugar
Instructions
- Lightly grease a non-stick 4-4 ½” tart pan
- To make the crust, in a small bowl, mix flours, powdered sugar, and salt
- Add the cold butter use your fingers to rub it into the dry mix until the consistency of coarse sand
- Pour in the cold water and gently press together until a dough forms
- Press the dough evenly into the bottom and up the sides of the mini tart pan. Place in the fridge for 10 minutes
- Remove and prick the base of your dough with a fork
- Bake at 350°F for 12–15 minutes, until a light golden brown on the bottom and deeper golden along the edges. Note, we’re just par-baking the crust here, so it will go back into the oven with the lemon filling as well
- While the crust bakes, make your lemon filling by whisking together lemon juice, zest, yolk, sugar, cream, melted butter, and a pinch of salt in a small bowl
- Pour filling into the warm, par-baked crust and return it to the oven to bake for another 10-13 minutes. The filling should be just set in the center, a slight jiggle is fine (it will firm up as it cools)
- Let your tart cool for 15 minutes at room temperature before placing it in the fridge for 2 hours to chill completely
- Before serving, add your cream to a bowl and sift over your powdered sugar. Whip until medium peaks form. Dollop or pipe over your chilled pie and enjoy!


I love these!