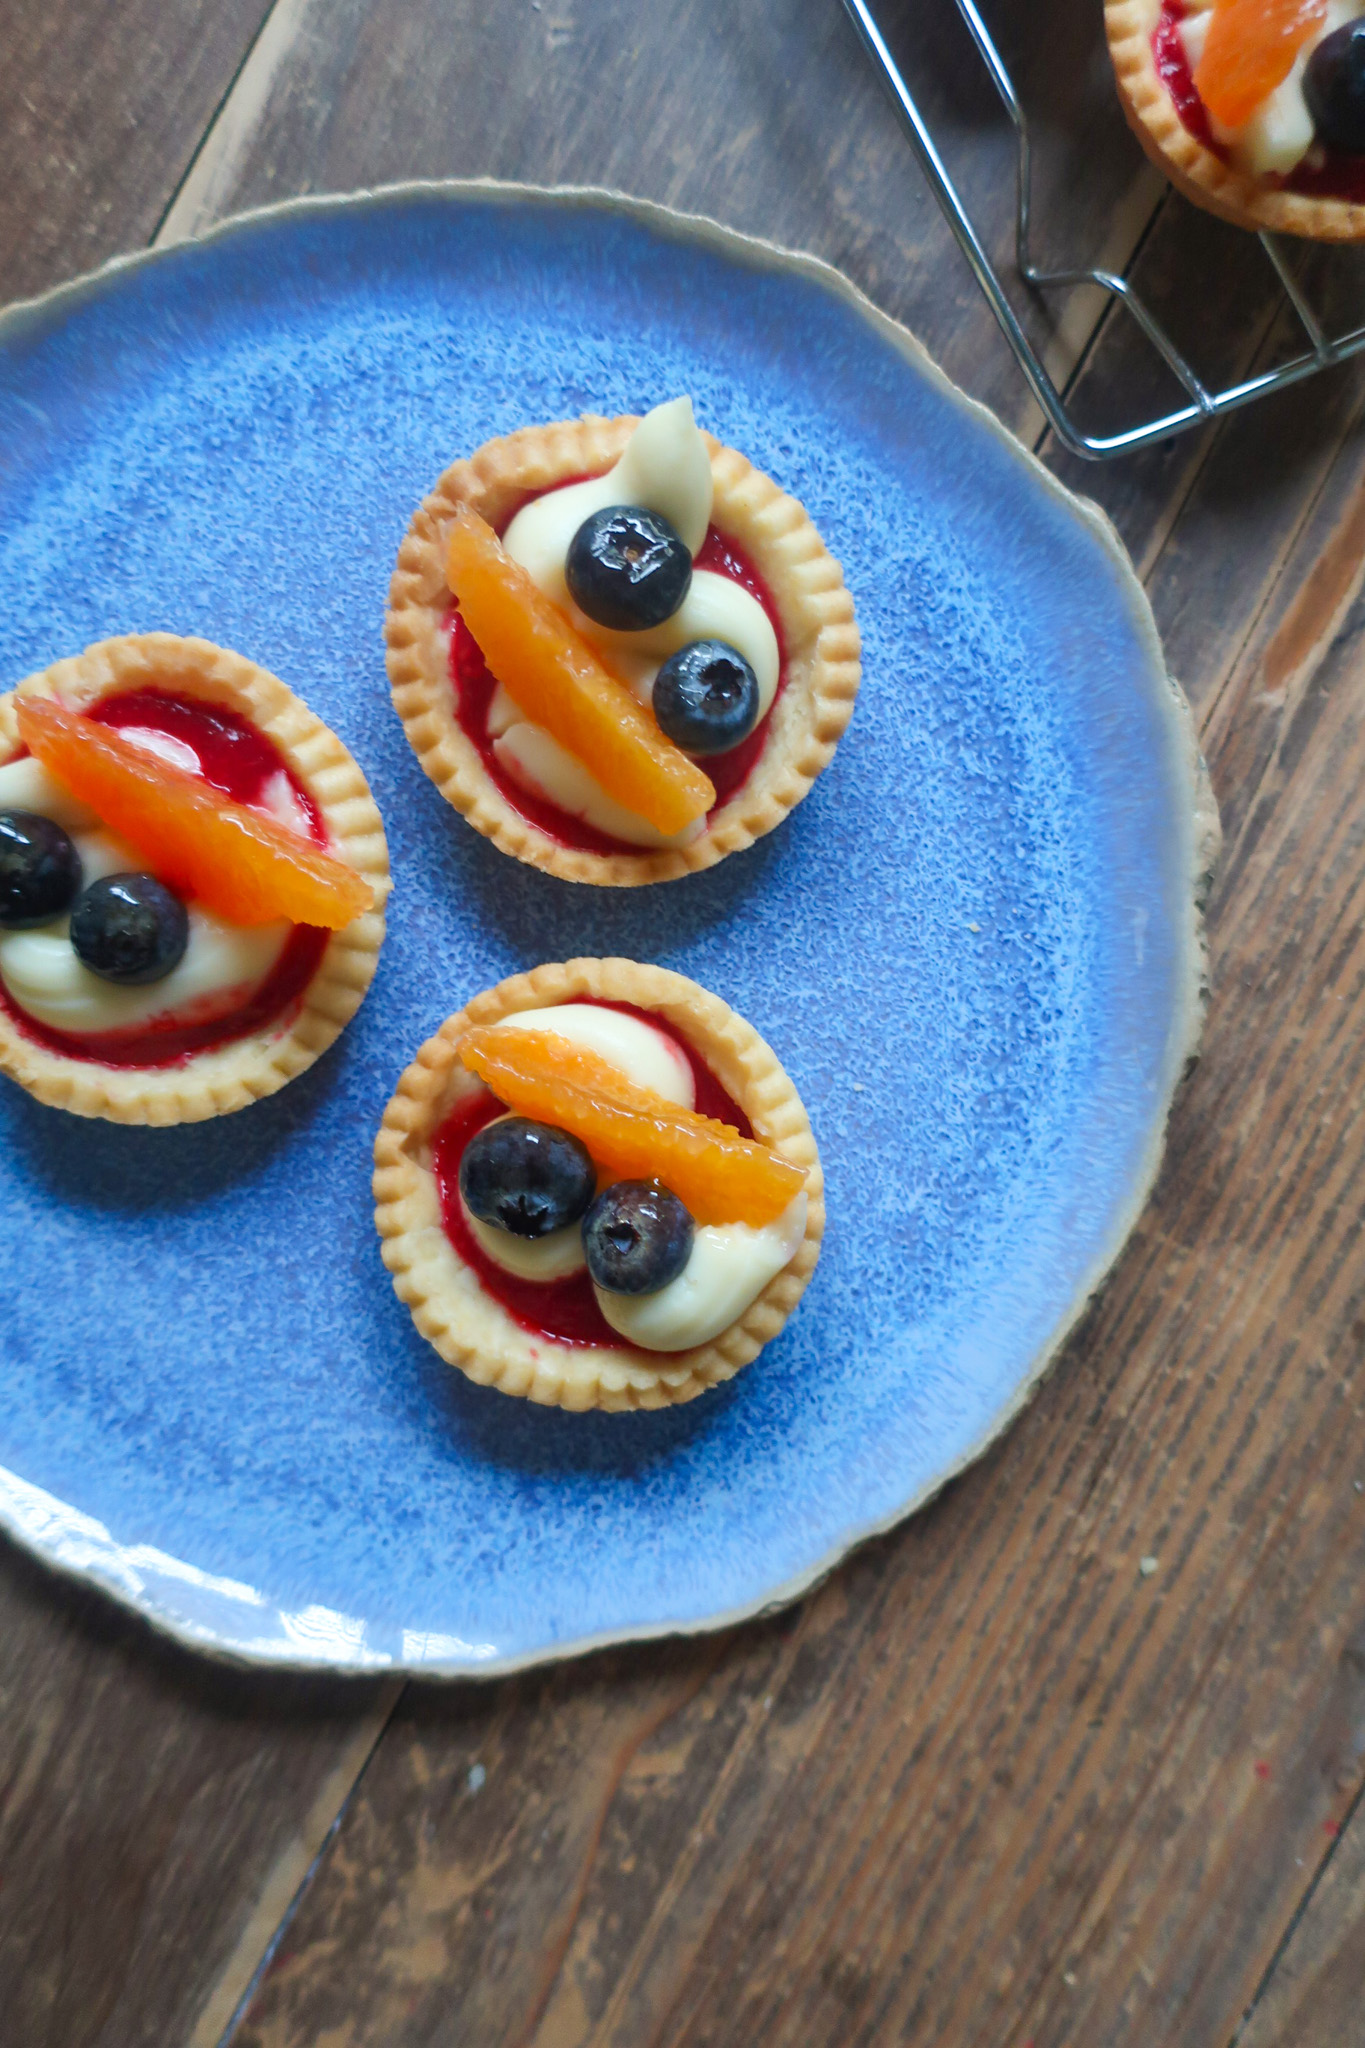
Mini Fruit Tarts with Pastry Cream & Fresh Fruit
I rarely walk by a tart, especially a mini fruit tart. Pastry crust? Check. Pastry cream? Check. Fruit? Check. There really is no losing.
The balance between the buttery crust, sweet cream, and sharpness of the fruit is honestly the perfect equilibrium. Whoever came up with this combo – my taste buds are forever indebted to you.
If you love this recipe, please rate and review it below and tag @accentgolden in your posts on social!
This website uses affiliate links, which may earn commission for purchases made at no additional cost to you.
WHAT IS A FRUIT TART?
A fruit tart is one of my favorite French pastry items. Traditionally, it’s made with a pastry crust base, filled with pastry cream, and topped with fresh fruit.
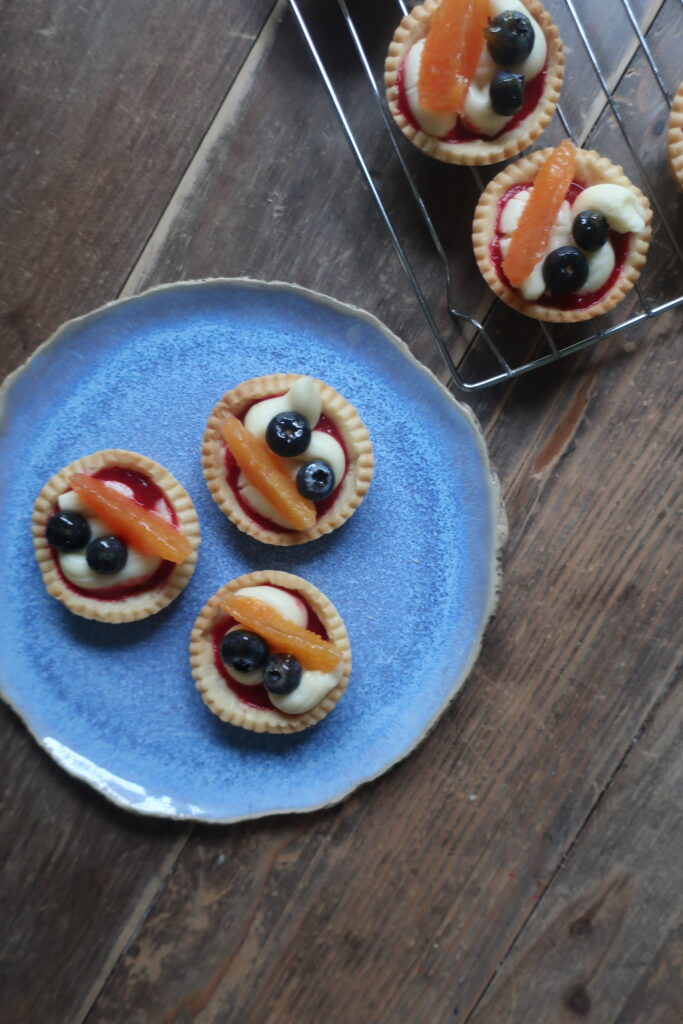
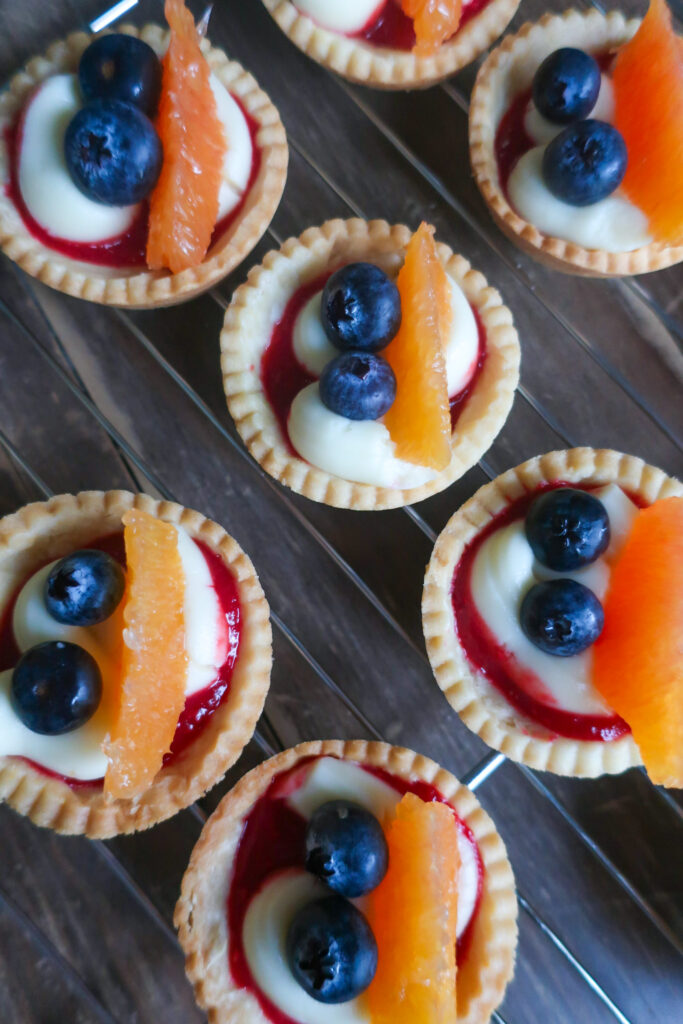
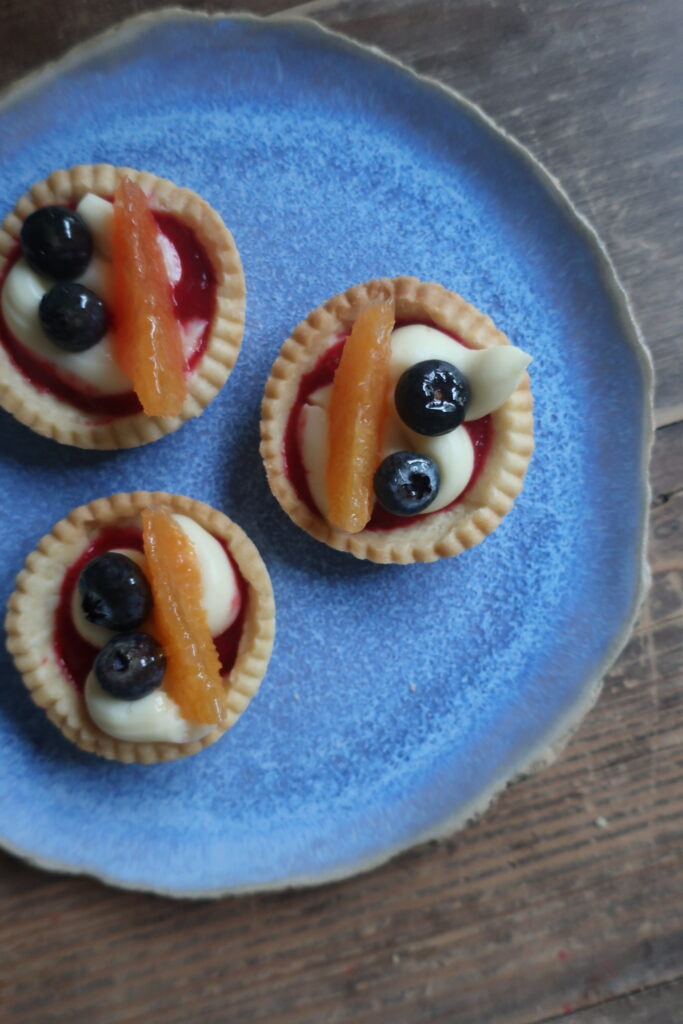
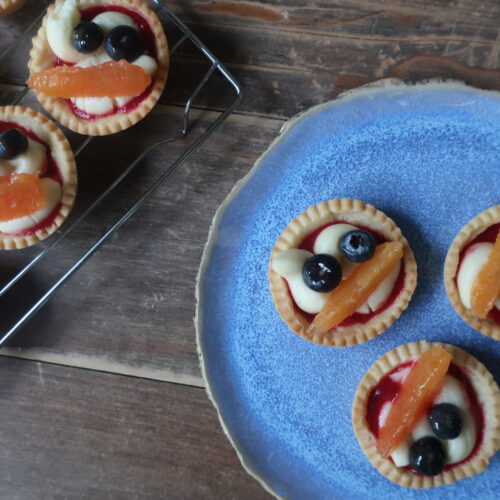
These mini fruit tarts are made up of four elements (cause we’re fancy): pastry crust, raspberry sauce, pastry cream, and fresh fruit. All in all, they are magic and the perfect treat for a party or just a solo weekend.
What can I use for baking weights? I use a mix of uncooked rice and dried beans, stored in a jar so I can reuse them whenever I need. You can also buy pie weights like these ones.

INGREDIENTS
- Whole milk: forms the base of the pastry cream, giving it richness and a smooth texture
- Vanilla extract: adds warm flavor to the cream
- Granulated sugar: sweetens both the pastry cream and raspberry sauce
- Egg: thickens the pastry cream and provides structure
- Flour: helps stabilize and thicken the pastry cream
- Cornstarch: creates a silky, custard-like consistency
- Unsalted butter: adds richness to both the pastry cream and pastry crust
- Raspberries: form the base of the fresh raspberry sauce
- Lemon juice: brightens and balances the sweetness of the sauce
- Powdered sugar: sweetens and tenderizes the pastry crust
- Egg yolk: binds the crust and gives it a golden color
- Salt: enhances overall flavor and balances sweetness
- Flour (for crust): provides structure and crispness to the tart shells
- Orange: adds fresh, juicy citrus flavor and color to the topping
- Blueberries: give a sweet, tart contrast and vibrant look to the tarts
- Apricot glaze: adds shine and preserves the fruit’s freshness
What fruit is best for topping a mini fruit tart? Any fruit that is “soft” to bite into works perfectly. Think blueberries, raspberries, strawberries, blackberries, oranges, kiwis, pomegranate, you name it!
HOW TO MAKE MINI FRUIT TARTS
Make sure to read through all the steps before you begin—both the pastry cream and raspberry sauce need time to cool before assembly. Once prepped, you’ll have the prettiest mini fruit tarts ready to serve.
Start by making your pastry cream…
Heat the milk and vanilla in a medium pot over medium-high heat until small bubbles form around the edges. In a bowl, whisk together eggs, sugar, cornstarch, and flour until smooth.
Slowly stream a third of the hot milk into the egg mixture while whisking, then repeat with the rest until combined. Rinse and dry the pot, pour the mixture back in, and cook over medium heat while whisking until thickened and boiling for one minute.
Remove from heat and whisk in the butter cubes one at a time until smooth and glossy. Transfer to a bowl, cover the surface with plastic wrap, and chill for a few hours until fully cooled.
For your simple raspberry sauce…
Add raspberries to a pot over low heat and stir until softened and juicy. Mix in sugar and lemon juice, stirring until dissolved and the sauce thickens slightly.
Remove from heat and blend with an immersion blender until smooth and pulpy. Strain through a fine mesh sieve, let cool 15 minutes, then refrigerate until ready to use.
To make your pastry crust….
Combine the dry ingredients in a bowl, add butter, and rub it in with your fingers until the texture resembles coarse sand. Stir in the egg yolk, then gently bring the dough together with a scraper into a soft ball.
Roll the dough between parchment paper into an 11-inch circle and chill. Peel off the top parchment, flip, remove the other side, and grease your muffin tin.
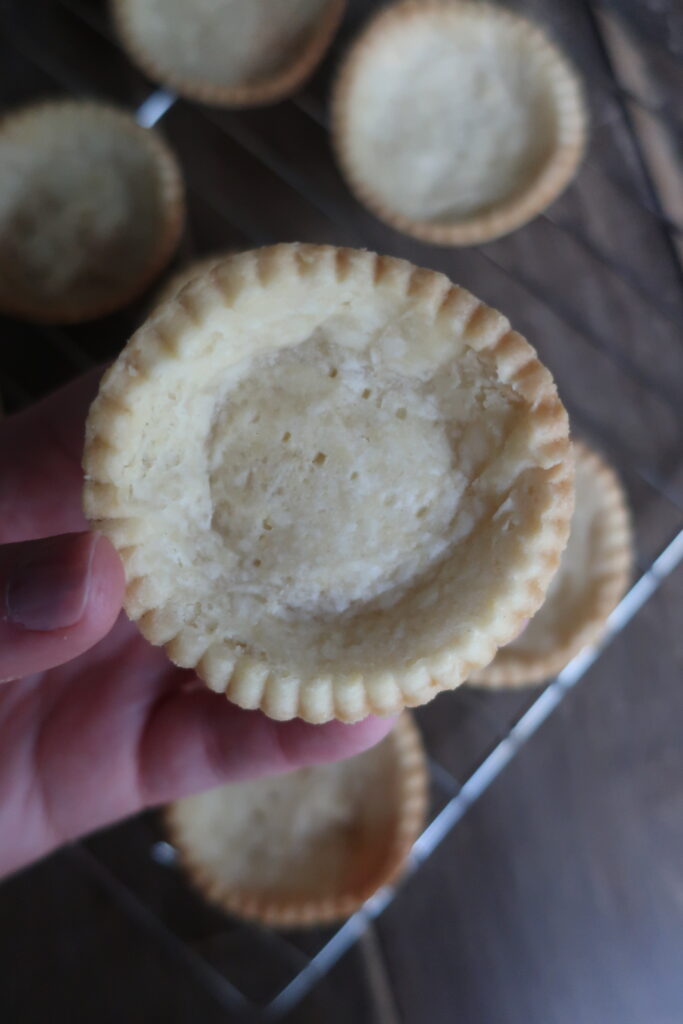
Cut out circles with a circle cutter, press gently into the muffin cups, and chill 10 minutes. Line each with parchment, fill with rice or beans, and blind bake at 350°F for 9 minutes.
Remove the parchment and weights, then bake another 5–8 minutes until golden around the edges. Cool completely in the tin before transferring to a wire rack.
Assembling your mini fruit tarts
Cut away the peel and pith from your orange, then slice the segments cleanly into wedges. Place the chilled pastry cream into a bag and get your cooled tarts ready.
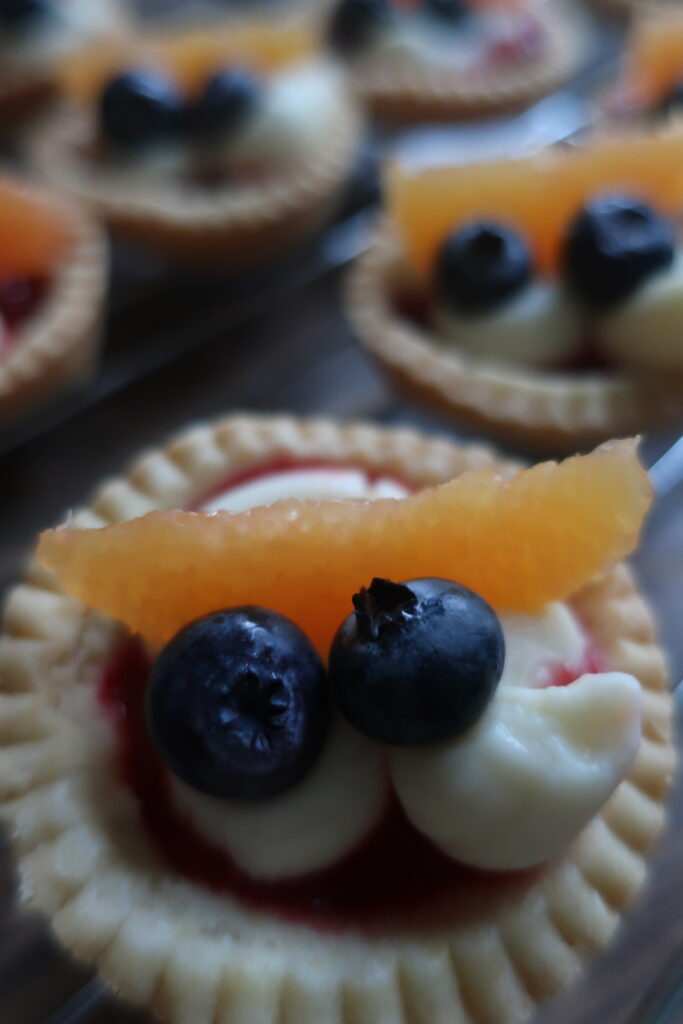
Spoon a teaspoon of raspberry sauce into each tart shell, then pipe pastry cream on top. Finish with orange slices, blueberries, and a brush of apricot glaze for shine.
Store your mini fruit tarts in a sealed container in the refrigerator for 2–3 days.
3 reasons you’ll love these mini tarts
TIPS & VARIATIONS
- Make sure that the entire surface of your pastry cream is covered in plastic wrap before chilling. This ensures that no skin forms on your cream as it cools.
- When working with the butter for your pastry crust, it should be slightly soft but still firm. If at any point it starts to feel like it’s melting, cover the bowl completely and place in the fridge for 5 minutes to firm.
- For that pretty edge on your tarts, use a fluted cutter. Otherwise a smooth circle cookie cutter works great.
- Before pressing the circles of crust into the muffin tin, check that the crust is set but not completely firm. It needs to be a little pliable as you press it in, otherwise it could break. If it is too firm, just let it sit for a minute or two on the counter before pressing it into your cups.
- You can choose whatever fruit you’d like to top your tarts with. I love a strawberry, raspberry, and kiwi combo as well!
- To change up your filling, sub in homemade lime curd for the raspberry sauce. Keep the pastry cream or swap it for some fresh whipped cream for a quick topping!
- To give you tarts that finally glossy shine, microwave a tablespoon of apricot jam, stirring every 10 seconds, until smooth. Gently brush on top of your fruit with a pastry brush!
MAKING AHEAD & STORING
Your raspberry sauce can be made ahead and kept in a sealed container in the fridge for up to two weeks. It can also be stored in the freezer for up to 6 months!
You can make the pastry cream the day before and keep it covered in the fridge until you are ready to assemble. Don’t make it more than 24 hours in advance if you plan on having leftover mini fruit tarts, because it will lessen their shelf life.
Once assembled, your mini fruit tarts should be kept in an airtight container in the fridge, where they will keep for 2-3 days.
MORE TART & PIE RECIPES
- Classic Blueberry Pie
- Easy Blackberry Pie with Marshmallow Whipped Cream
- Single-Serve Lemon Tart with Whipped Cream
- Homemade Chocolate Fudge Pie
- Rustic Tartiflette Galette
EQUIPMENT YOU’LL NEED
Equipment
- Mixing Bowls
- Dough Scraper
- Parchment Paper
- Rolling Pin
- Pie weights or dried beans/rice*
- Muffin Pan
- Medium Pots
- Whisk
- Spatulas
- Digital Scale
- Measuring Cups
- Measuring Spoons
- Piping Bags
- Immersion Blender
- Tall container, for blitzing
- Fine Mesh Strainer
- Round Cookie Cutter
Ingredients
- 250 g whole milk (1 cup)
- ¼ tsp vanilla extract
- 50 g granulated sugar (approx. ¼ cup)
- 50 g beaten egg little less than one whole egg
- 12.5 g flour (2 tbsp)
- 12.5 g cornstarch (2 ¼ tbsp)
- 25 g unsalted butter cubed (2-3 tbsp)
- 2 ½ cups raspberries
- ¼ cup granulated sugar
- ½ lemon juiced
- 8 tbsp unsalted butter cubed, slightly soft but firm
- ⅓ cup powdered sugar
- 1 egg yolk beaten
- 1 egg beaten (optional for brushing crust)
- ½ tsp salt
- 1 ¼ cups flour
- 1 orange
- ½ – ¾ cup fresh blueberries
- 1 tbsp apricot jam optional for finishing
Instructions
- *Make sure to read all the instructions before preparing your mini fruit tarts. The pastry cream and raspberry sauce will need a few hours to cool before you can assemble!
PASTRY CREAM
- Add your milk and vanilla to a medium pot and place over medium-high heat until a ring of small bubbles appear around the edge of the liquid.
- In a bowl, whisk together your eggs and sugar for one minute. Whisk in your cornstarch and flour. Whisking for another minute until everything is incorporated.
- Once you milk reaches scalding point, stream in ⅓ of liquid into your egg mixture, whisking constantly. Repeat with another third, whisk, and then the final third, until all is incorporated.
- Rinse your pot with cold water to cool it down and wipe out any residue. Return all of the liquid from the bowl, back to the pot.
- Place your pot over medium heat, use a whisk to constantly stir the mixture as it thickens. Bring to a boil, then boil for only one minute stirring continuously so it evenly thickens.
- Remove the pot from the heat and drop in one cube of butter at a time, whisking each in before adding another piece. Repeat until all your butter is added.
- Pour your pastry cream into a bowl and cover the surface of the cream with plastic wrap* before placing in the fridge for a few hours to cool completely.
RASPBERRY SAUCE
- Place raspberries in a pot over low heat. Stir until softened and juices begin to release.
- Pour in your sugar and lemon juice, stir to combine. Continue stirring until sugar has dissolved and mixture has thickened to a thin gravy consistency
- Remove from heat and pour into a tall container (that your immersion blender can fit all the way to the bottom). Using your immersion blender, pulse until mixture is mostly pulpy with no chunks.
- Pour mixture into container through fine-mesh strainer, scraping the bottom of the container to grab any excess sauce.
- Cool for 15 minutes at room temperature then place in the fridge to chill while you prep your other ingredients
PASTRY CRUST
- Stir together all dry ingredients in a bowl. Add butter, gently stir to coat. Use your fingers to rub the butter into the dry ingredients until a sand-like consistency. Add beaten egg yolk and cut through mixture with dough scraper or spoon.
- Gently compress dough with dough scraper to begin to bring it together into a ball, then dump the dough and any “dust” onto your work surface. Using a smearing technique, gently smear out a few sections of dough with your scraper – pushing a section out – and then scrape back together, towards dough ball. Keep an eye on your dough, once there are no more dry spots stop mixing.
- Gently form your dough into ball and place between a folded piece of parchment paper. Roll it into an 11-inch circle, then place in the fridge to set
- Remove your dough from the fridge and gently peel the parchment paper from the top, smooth it back on (after removing), flip your dough over, and gently remove the parchment paper from the top side.
- Grease your 12-cup muffin tin
- With a circular cookie cutter that is about the width of your muffin cup, cut out eight circles of dough. Reform and re-roll the dough as needed between the parchment paper.
- Gently press* your circles into the greased muffin cups. Return to the fridge for 10 minutes to chill your crust.
- Cut parchment paper into small squares, to fit inside each cup, and fill with rice or beans for your blind bake.
- Bake at 350F, for 9 minutes. Carefully remove the parchment paper with the beans/rice and return to the oven for another 5-8 minutes, until edges are lightly golden. Keep a close eye on them at this stage and rotate your pan if needed!
- Remove from oven and allow to cool in muffin tins. Once cool, gently remove and place on a wire rack to cool completely.
ASSEMBLY
- Using a knife, slice your oranges. Cut off the top and the bottom of your orange, and place one flat side down on a cutting board. With your knife, carefully cut away the peel, from top to bottom, getting as much of the pith off as possible. Slice off any remaining pith, once finished. Holding the orange in one hand, cut out each wedge by slicing gently into the edge of a segment, and then the other side of it. Remove and place in a bowl.
- Place cold pastry cream into a piping bag.
- Spoon a teaspoon of raspberry sauce on the bottom of a cooled pastry cup then pipe your pastry cream inside. Top with a slice of orange and a few blueberries.
- For a final glossy look, microwave your apricot jam until runny (stirring every 10 seconds) and gently brush on your fruit.
- Store in a sealed container in the fridge for 2-3 days.