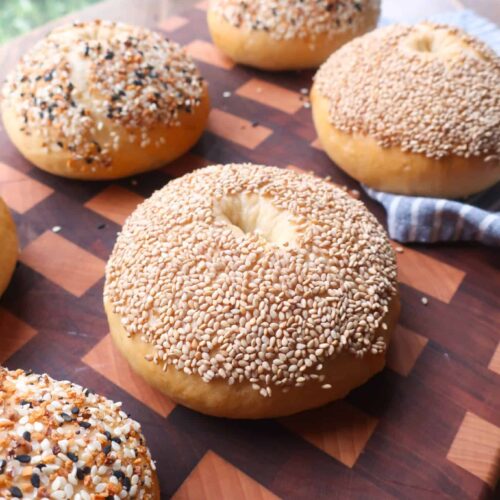
My Favorite Homemade Bagels Recipe
I love a bagel. So when we learned to make homemade bagels in pastry school, I was more than delighted.
Whenever I’m on a road trip, one of my favorite morning breakfasts is a hot mocha and a bagel sandwich – preferably bacon, egg, and cheese with tomatoes and onion. It must be that sweet and salty balance, cause boy does it do it.
This is hands down my favorite recipe for thick and chewy, bakery-style homemade bagels, right at home.
If you love this recipe, please rate and review it below and tag @accentgolden in your posts on social!
This website uses affiliate links, which may earn commission for purchases made at no additional cost to you.

HOMEMADE BAGELS
As with many bread recipes, there are very few ingredients needed to make bagels from scratch. The dough is made up of water, yeast, bread flour, diastatic malt powder, and salt, before being kneaded and left to rise.
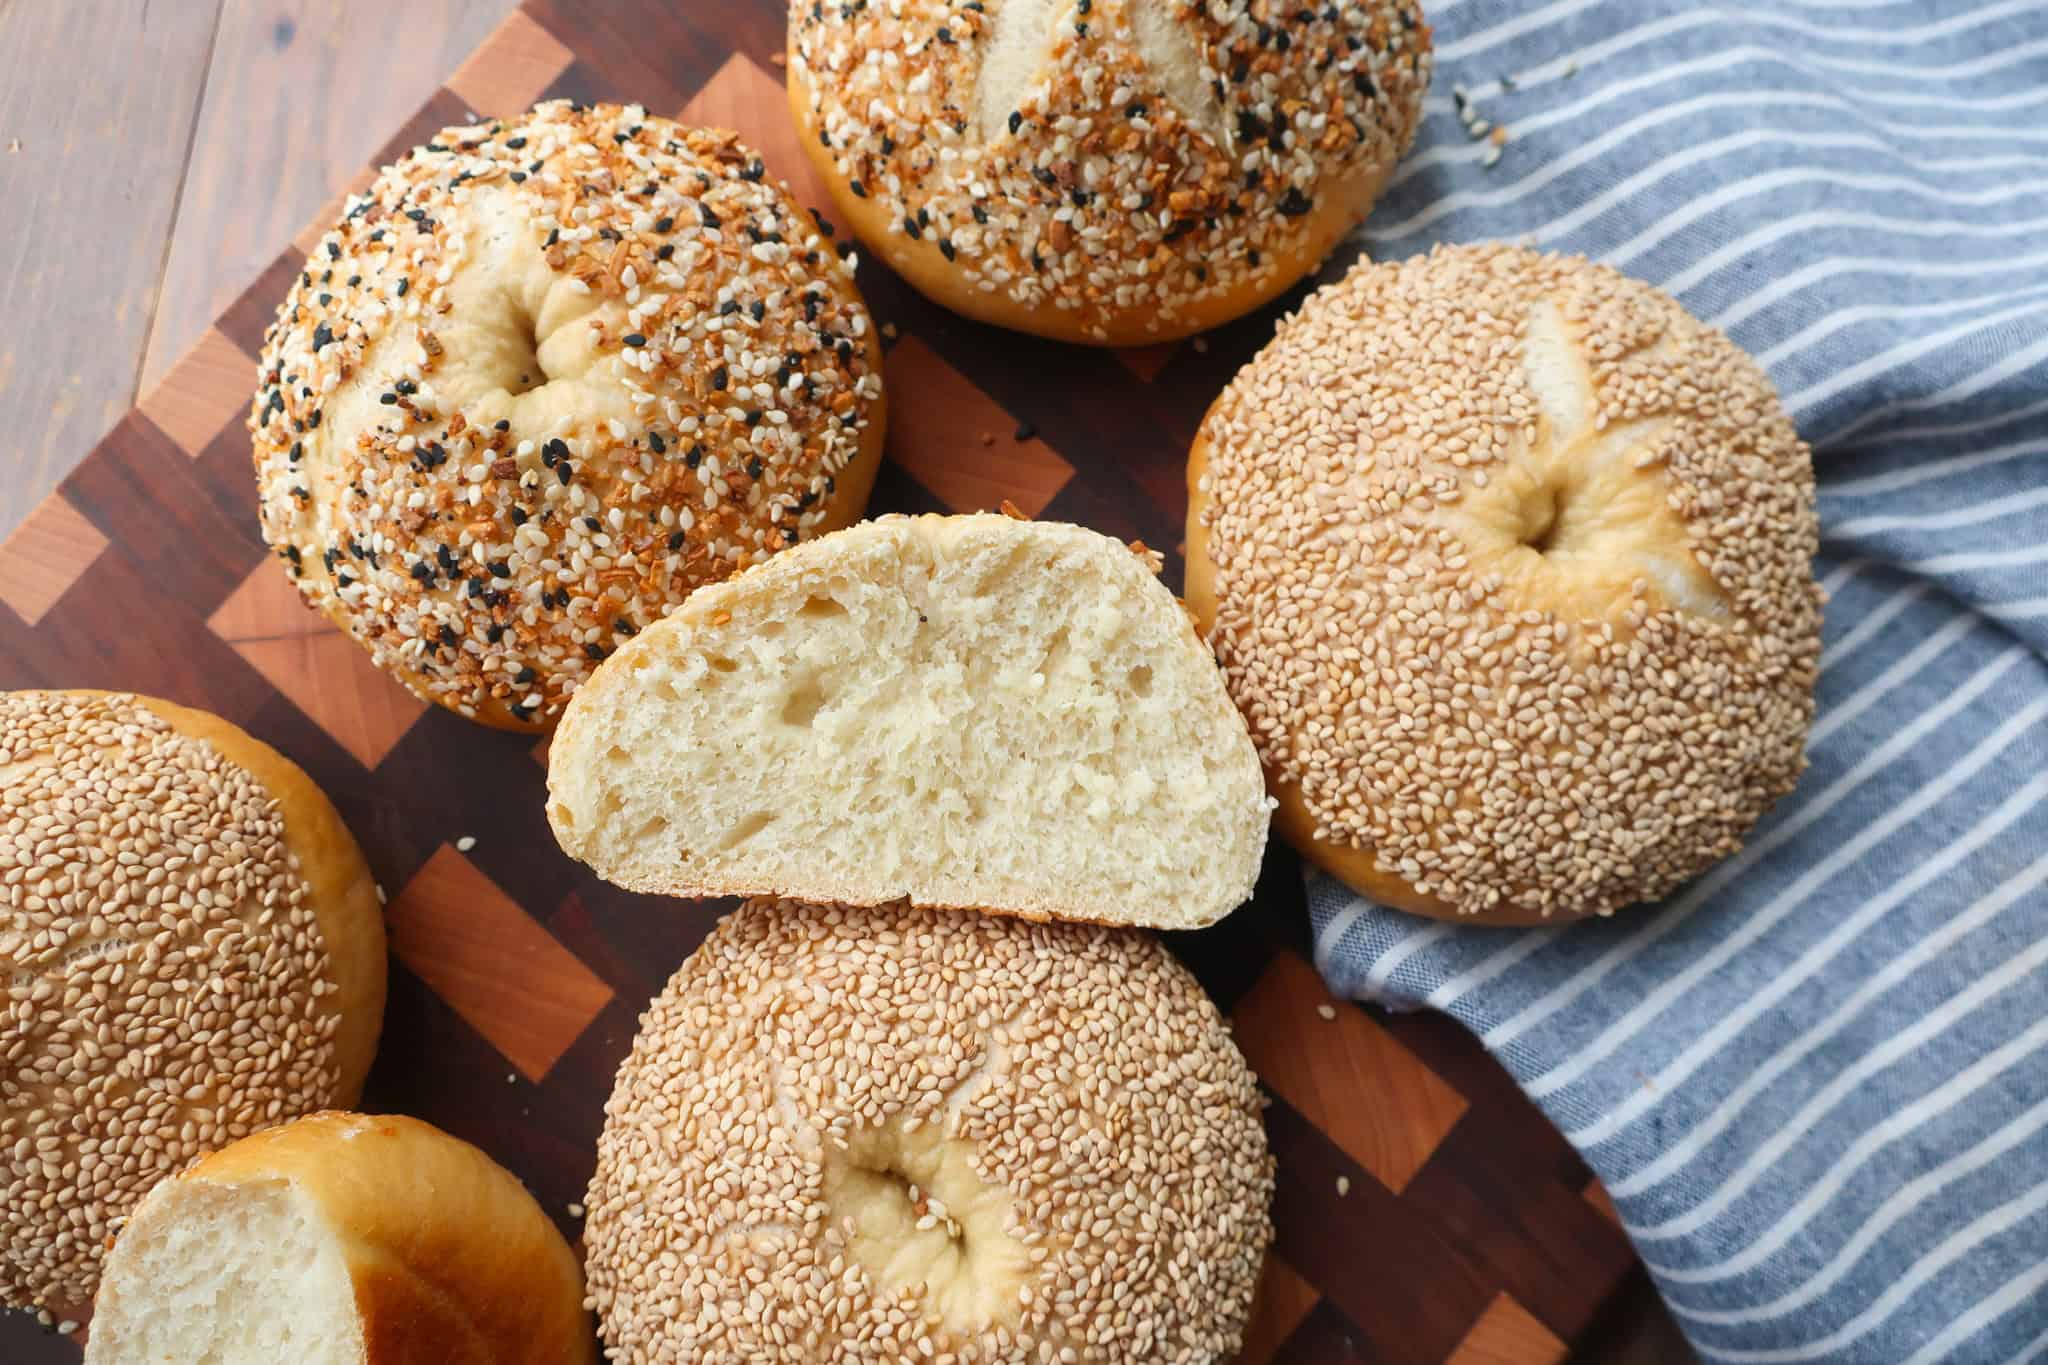
Once shaped and chilled, the bagels are given a quick boil in a mixture of honey and water. You can bake these up plain or top as you please! Personally, my favorite bagel flavor is a hearty coating of everything bagel seasoning.
What is diastatic malt powder? It’s a finely ground flour made from malted barley. Adding it to your dough grants a better rise, chew, flavor, and color to your bagel.
INGREDIENTS
- Warm water: Activates the yeast and hydrates the dough for proper gluten development.
- Active dry yeast: Leavens the bagels, creating a puffed and light structure.
- Bread flour: Provides high protein for strong gluten formation and that signature chewy texture.
- Diastatic malt powder: Enhances fermentation, improves browning, and adds subtle malty depth.
- Salt: Strengthens gluten and balances flavor.
- Honey: Added to the boiling water to promote shine, deep golden color, and slight sweetness on the crust.
- Toppings: Optional for added texture, flavor, and classic bakery-style finish.
What’s the purpose of the windowpane test? Testing your dough after kneading it, before leaving it to rise, confirms whether or not your dough has developed enough gluten. A strong gluten network is key to both structure and chew.
HOW TO MAKE HOMEMADE BAGELS
To make your homemade bagel dough…
In the bowl of a stand mixer, combine warm water and active dry yeast, then let it sit for about 5 minutes until foamy and bloomed. This step activates the yeast, essential for light, chewy homemade bagels.
Add the bread flour and diastatic malt powder, then mix with the dough hook for 3–5 minutes until a smooth dough forms and no longer sticks to your finger when pressed. This initial mix builds structure and begins developing the gluten needed for classic bagel texture.
Add the salt and continue mixing on medium speed for 8–12 minutes until the dough becomes strong and elastic. To check for proper kneading, stretch a small piece of dough; if it passes the windowpane test and allows light through without tearing, it’s ready.
Cover the bowl with a towel and let the dough rise in a slightly warm spot for 45–60 minutes, or until just doubled in size. This first rise improves flavor and gives your homemade bagels their soft interior crumb.
Shaping your dough into bagels…
Turn the dough out onto your counter and weigh it, then divide it into six equal portions using a dough scraper to avoid tearing. Keeping the dough intact helps preserve the gluten structure for chewy bagels.
Shape each portion into a tight dough ball by pressing gently with your palm and moving your hand in a circular motion until the surface becomes smooth and taut. This tension creates a strong outer structure that helps the bagels hold their shape.
Cover the shaped dough balls and let them rest for 30 minutes to relax the gluten. This short rest makes shaping the bagels easier and prevents shrinking.
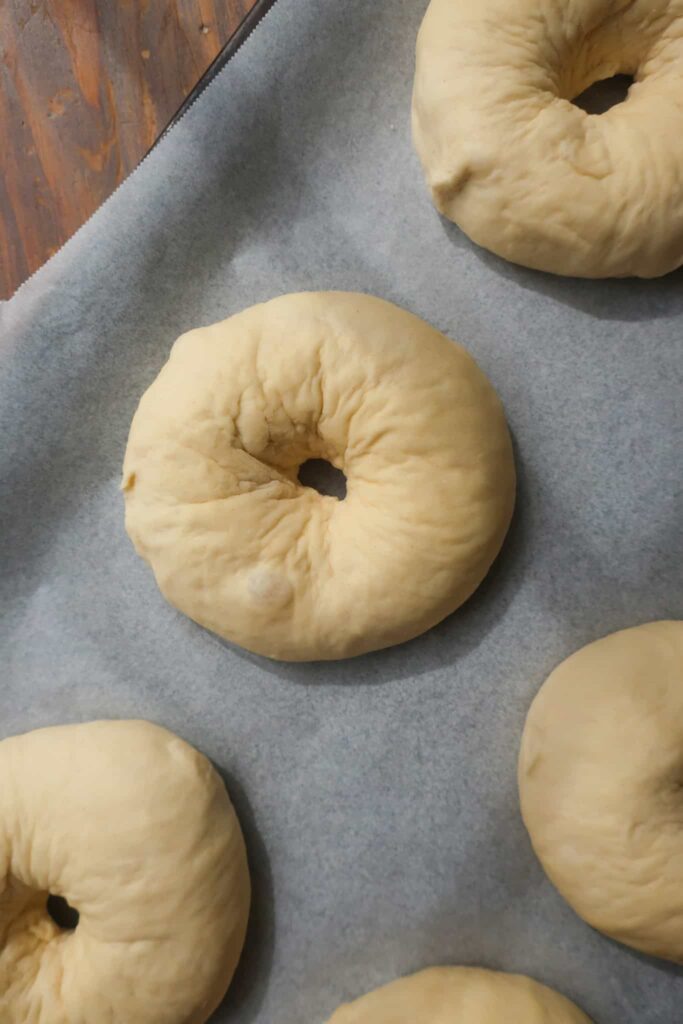
To shape, press your finger through the center of each dough ball and gently stretch the hole using both hands to form a ring. Make the center hole slightly larger than you want the finished bagel, as the dough will puff and shrink during baking.
Place the shaped bagels on a plate and refrigerate uncovered for 15 minutes to help them firm up. This brief chill makes them easier to handle before boiling.
Topping and baking your homemade bagels…
Preheat your oven to 350°F and line a baking sheet with parchment paper to prevent sticking. Meanwhile, bring a large pot of water and honey to a gentle simmer.
Boil the bagels in batches of no more than three at a time, cooking for 30 seconds per side before removing with a slotted spoon. Boiling before baking is the key step that creates the signature chewy crust of bakery-style bagels.
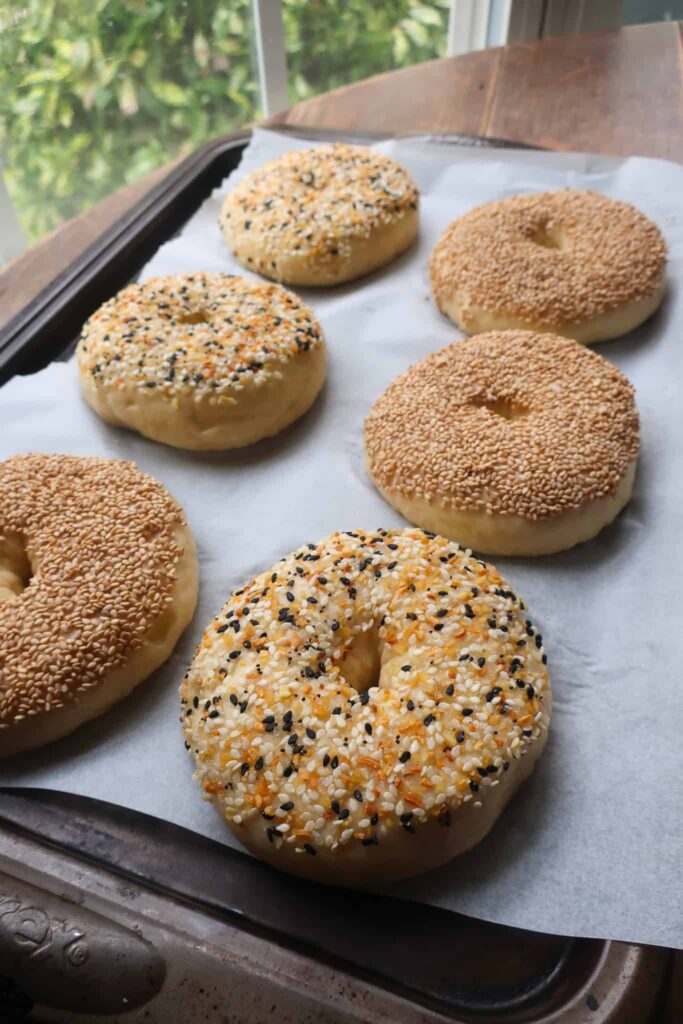
If adding toppings like everything bagel seasoning or sesame seeds, dip the tops into your desired seasoning while still damp. Place them back on the baking sheet, leaving space between each bagel for even baking.
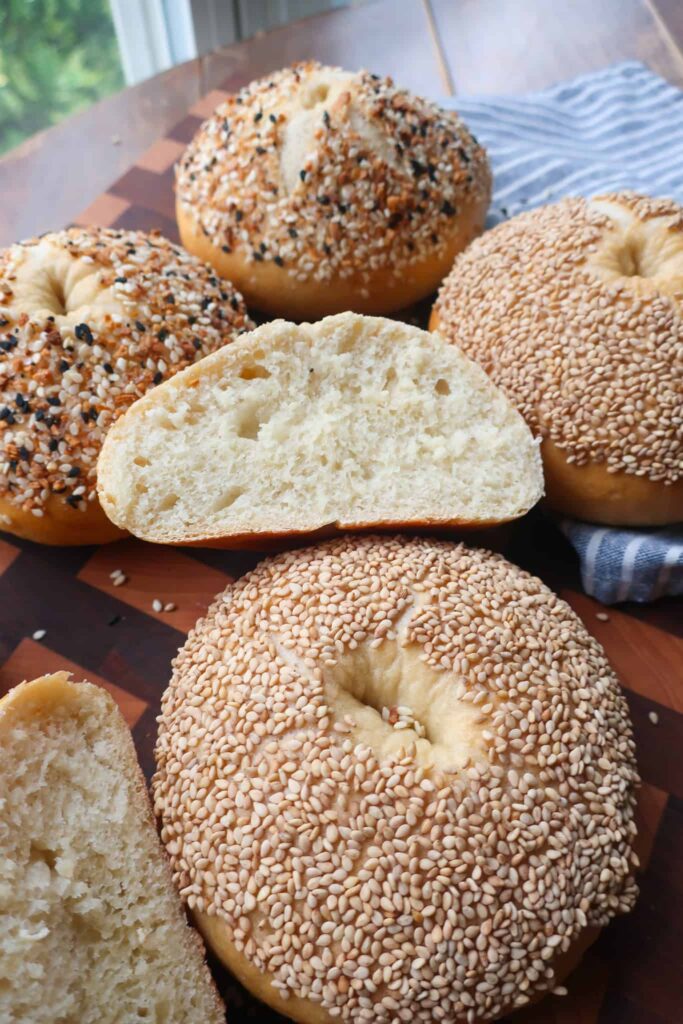
Bake for 18–20 minutes, or until the bagels are deeply golden brown and glossy. Transfer the baked bagels to a wire rack and let them cool slightly before slicing.
3 reasons you’ll love these made-from-scratch homemade bagels
TIPS & VARIATIONS
- You can find diastatic malt powder online here.
- Before the first rise, perform the windowpane test on a piece of the dough, to ensure it has been kneaded long enough. If the dough is tearing before you can see light through it, knead for another 2-3 minutes and then re-test.
- I made a smaller hole in my bagels when shaping them, roughly ¾” wide. Personally, I like the overall look, but if you prefer a hole you can see through, top to bottom, stretch your center open to about 1 ½” – 2” inches wide when shaping.
- If dipping into toppings like seasonings or seeds, pour them into an even layer on a plate, roughly as wide (or a little wider) as your bagels. Once you’ve boiled your bagels, dip the dampest side directly into the toppings to get an even coat before placing them back on your baking sheet.
- The total time your bagels bake for will depend on how deep of a color you want. For that golden finish, 18-20 minutes should do the trick, but you’re welcome to leave them in a little longer if you prefer them a bit darker.
STORING YOUR HOMEMADE BAGELS
These bagels are at their fluffiest when fresh. You can store leftover bagels in an airtight bag at room temperature for up to 2 days or in the freezer for up to 3 months.
I like to freeze my extra homemade bagels whole, and then when I’m ready to enjoy, I pop them in the microwave for 20-30 seconds to soften enough to cut in half before toasting.
MORE BREAKFAST RECIPES
- Cinnamon Sugar Sweet Potato Pull-Apart Bread
- Quick Apple Cinnamon Scones
- Homemade Donuts with Chocolate Glaze
- Easy Mini Mediterranean Quiche
- Chocolate Chip Waffles for One (No Egg!)
EQUIPMENT YOU’LL NEED
- Mixer with dough hook attachment
- Digital Scale
- Measuring Cups
- Plate
- Towel
- Dough Scraper
- Large Pot
- Baking Sheet
- Parchment Paper
- Slotted Spoon
- Wire Rack
Equipment
- Mixer with dough hook attachment
- Digital Scale
- Measuring Cups
- Plate
- Towel
- Dough Scraper
- Large Pot
- Baking Sheet
- Parchment Paper
- Slotted Spoon
- Wire Rack
Ingredients
- 280 g warm water
- 2.5 g active dry yeast
- 454 g bread flour
- 4 g diastatic malt powder
- 9 g salt
- 10 cups water
- ½ cup honey
- Toppings if desired Everything Bagel Seasoning, Sesame Seeds, etc.
Instructions
- To the bowl of your mixer, add your warm water and sprinkle over the yeast. Leave to sit for 5 minutes to bloom
- Add in the bread flour and diastatic malt powder. With the dough hook attachment, mix for 3-5 minutes until smooth and no longer sticky. You should be able to poke the dough without the dough sticking to your finger
- Add in the salt and mix on medium speed for 8-12 minutes. To test if your dough has been kneaded enough, tear off a piece of dough and gently stretch it. If you can see light come through the dough without it tearing when spread, it’s ready
- Cover bowl with a towel and leave to rise until just doubled in size. This should take around 45-60 minutes in a slightly warm spot in your home
- Use a dough scraper to remove your dough from the bowl and weigh it. Divide into six even balls, cutting and adding as needed. Do not tear your dough!
- To form your dough into balls, one at a time, press down gently but firmly with the palm of your hand, moving your hand in a counterclockwise motion. You’ll feel the dough begin to tighten, slowly release pressure (moving your hand up), and cup the dough, continuing to swirl, forming a cage around your dough with your hand, almost like a catcher’s mitt. Repeat until you have a smooth dough ball
- Once you’ve rolled all your balls, leave them together on the counter or place them on a plate, and cover. Let them rest for 30 minutes
- One ball at a time, press your pointer finger into the center to gently form a hole. Once poked, use a finger from each hand to gently pull the ring of your dough to form your bagel shape. I made the hole in mine a little smaller (around ¾-inch), but if you want to see the hole all the way through once baked, stretch to about a 1 ½ inch – 2 inch wide hole in the center. Keep in mind that the dough will puff as it bakes, shrinking that hole
- Place on a plate, uncovered, in the fridge for 15 minutes
- Preheat your oven to 350°F and line a baking sheet with parchment paper
- In a wok or large pot, bring the remaining 10 cups of water and honey to a gentle simmer
- Add your bagels, no more than three at a time, to your simmering water and cook 30 seconds, before flipping and cooking an additional 30 seconds. Use a slotted spoon to remove, shaking off any excess water, and place on a parchment-lined baking sheet
- If topping your bagels, add seasoning/seeds to a plate and dip your bagel tops into it to coat. Place them back on the baking sheet, leaving an inch or so of space inbetween
- Bake for 18-20 minutes, until golden or your desired level of brownness
- Remove from the oven and transfer to a wire rack to cool. Enjoy!

Soft and chewy – delicious bagels!