Oreo Mummy Cake Pops: Easy Halloween Recipe
I know that cake pops are often targeted more for children, but if that’s the case, I’m a child in an adult’s body. Cue these Oreo mummy cake pops, for the easiest Halloween treat!
I’ve shared before that I find rolling cake pop dough into balls and then giving them a smooth dunk… almost impossible. So I prefer to flatten my pops and cut them into fun (or simple!) shapes.
If you love this recipe, please rate and review it below and tag @accentgolden in your posts on social!
This website uses affiliate links, which may earn commission for purchases made at no additional cost to you.


WHAT IS A CAKE POP?
A simply delicious treat, I tell ya. Just break down a baked cake into fine crumbles, mix with frosting, and shape.
You can keep them as simple as a sphere on a stick or shape them into fun and festive treats any time of year. Hence, the Halloween-timed vibe for these Oreo mummy cake pops.
Why do you refrigerate cake pop dough? This allows time for your cake to absorb the moisture of your frosting. Making it easier to roll and shape the cake pops with fewer cracks.


INGREDIENTS
- Baked Oreo cake: serves as the base for the cake pops, providing flavor and structure.
- Oreo frosting: binds the cake crumbs together to form the cake pop dough and adds extra cookies-and-cream flavor.
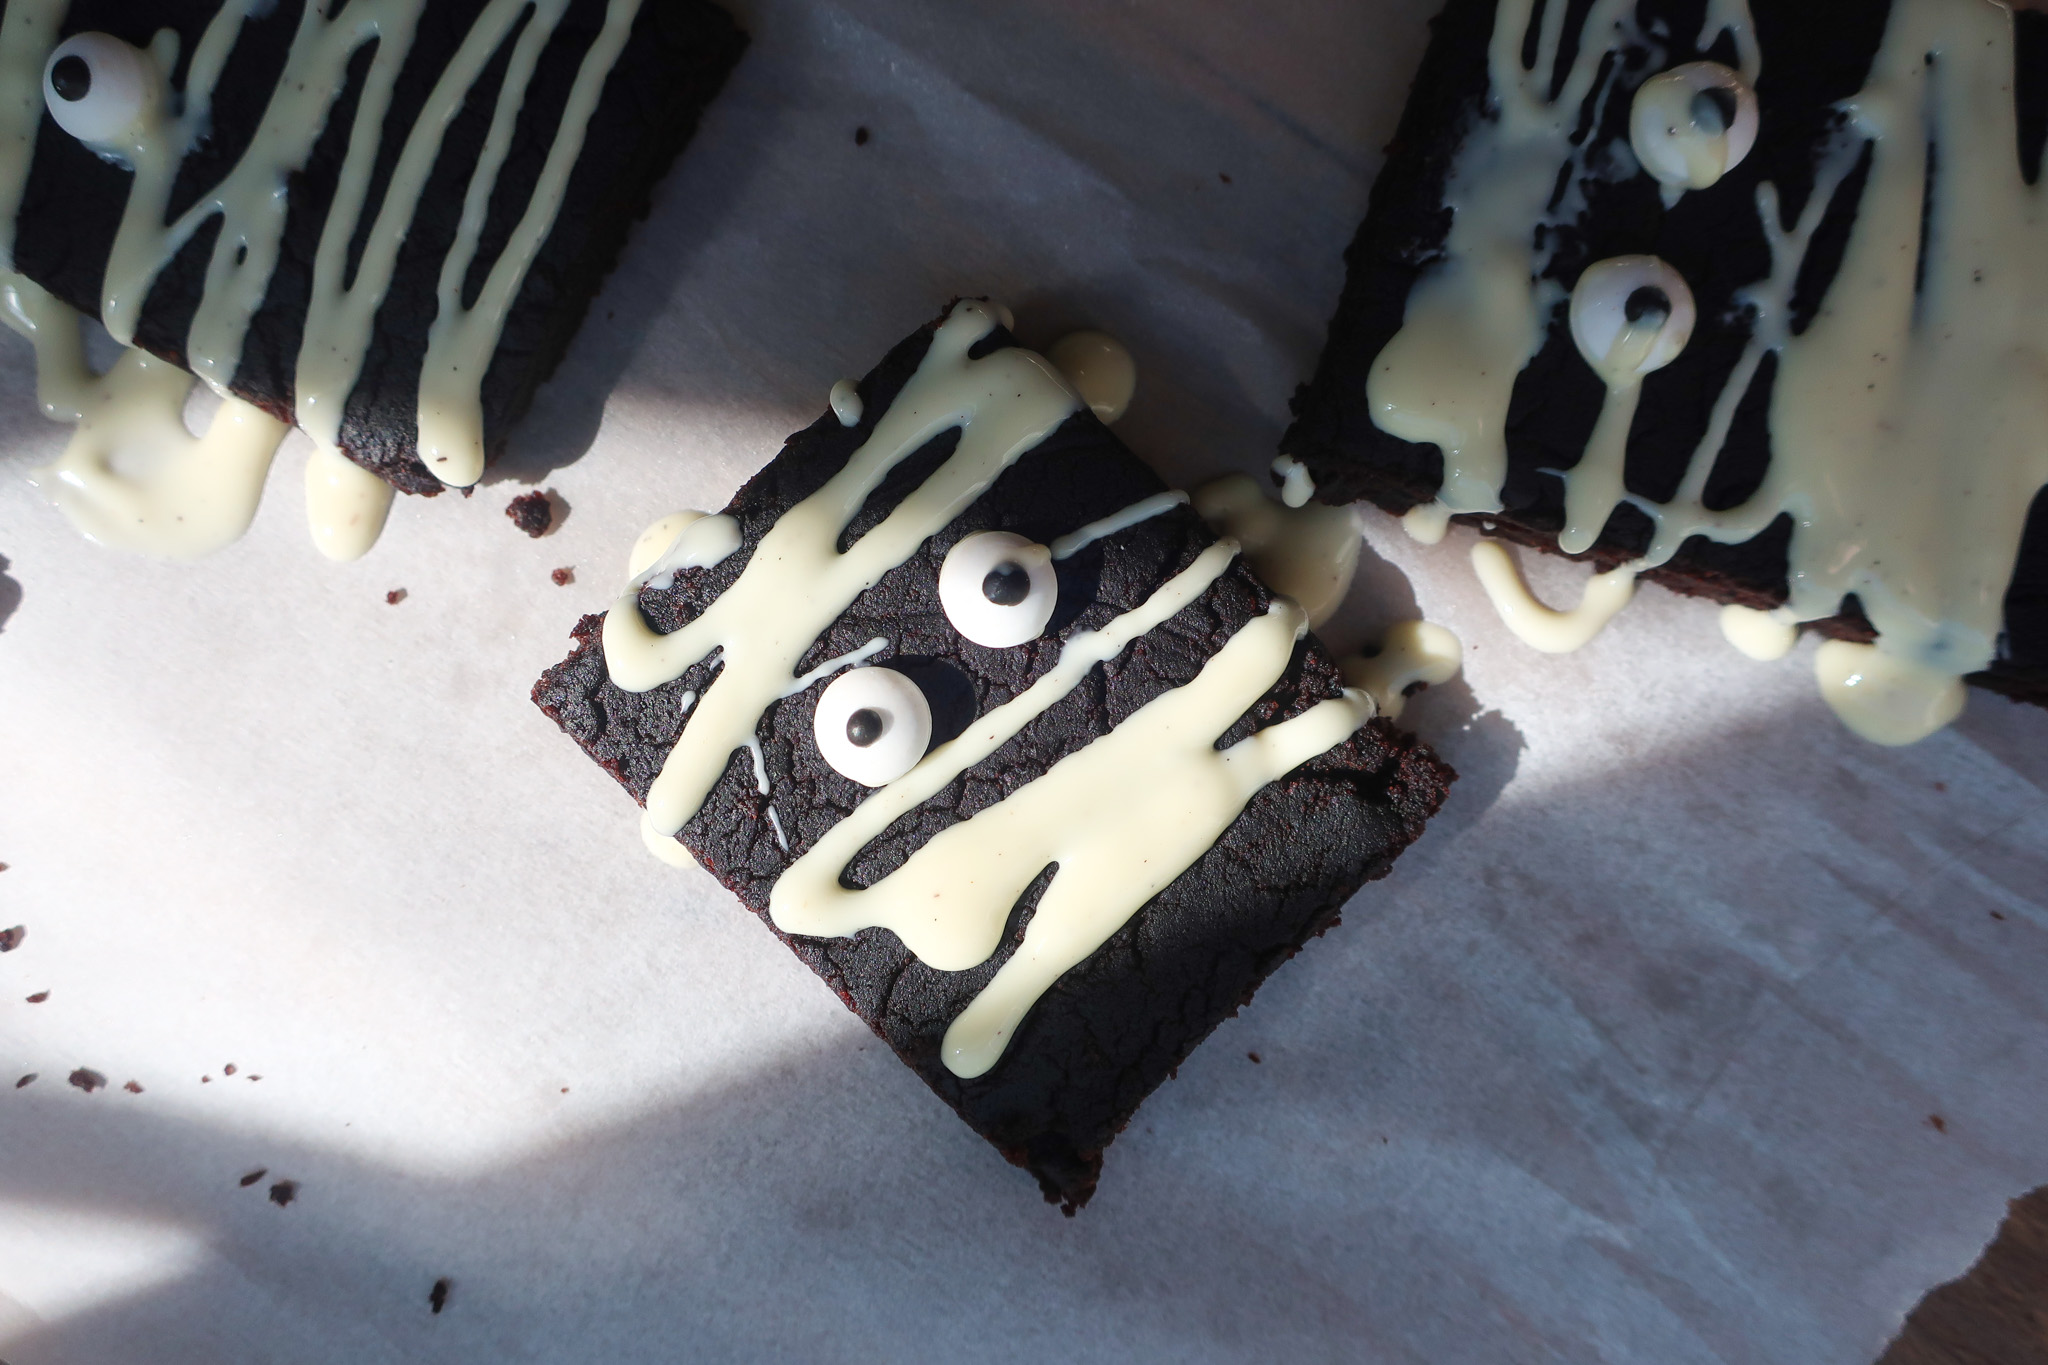
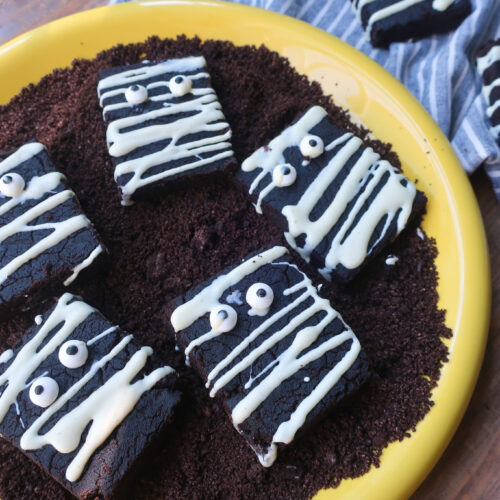
- White chocolate: drizzled over to that mummy look and added flavor.
- Edible eyeballs: adds a fun, spooky Halloween detail to finish off the “mummy” effect.
What other shapes can I make with cake pop dough? Cut into circles or roll into balls and decorate into fun faces. You can also use any cookie cutter to cut unique cake pop shapes!
HOW TO MAKE MUMMY OREO CAKE POPS
Add your baked cake to a mixing bowl and use a mixer or your hands to break it into fine crumbles. Stir in ¼ cup of Oreo frosting until the dough can be pressed together like Play-Doh, adding more frosting if needed.
Pat the dough into a flattened disc, wrap it tightly in foil, and chill in the fridge for 30 minutes. This will make it easier to roll and cut.
Once chilled, roll the cake pop dough between two sheets of parchment paper to about ½-inch thickness. Use a knife to cut 2 ½” x 3” rectangles, re-rolling the dough as necessary.
Lay the cut mummies on a wire rack and place edible eyeballs on each.
Pour the white chocolate into a microwave-safe container and heat in 30-second intervals, stirring in between, until smooth and fully melted.
Allow the chocolate to cool slightly, then drizzle it over the cake “pops” using a piping bag or a fork.
Refrigerate the cake “pops” for at least 20 minutes, or until the chocolate has hardened, before serving.


3 reasons you’ll love these Oreo mummy cake pops
TIPS & VARIATIONS
- Make sure your baked cake is crumbled into fine crumbles. This will make it easier for the dough to stick together once the Oreo buttercream is stirred in.
- You can make this recipe with any cake and frosting pairings you have on hand!
- If using a different cake recipe, you may need more or less frosting to get the right cake pop dough consistency.
- If your cake pop dough seems crumbly or too dry, just add a few tablespoons more frosting at a time until you get it there.
- The dough should be on the softer side. If it’s too dry, it will crumble when you try to roll it
- You can make these into mummy Oreo cake pops or try a different shape! Grab any cookie cutter and style to your Halloween heart’s content.
- You can find edible eyeballs online or oftentimes at the dollar store!
MAKING AHEAD & STORING
Once you’ve made your Oreo mummy cake pops, they can be stored in an airtight container at room temperature for up to a week or in the fridge for up to 2 weeks.
Additionally, you can prep these in advance and keep them in the freezer for up to 3 months! Just remove them a few hours before you plan to serve, so they have time to thaw.
MORE RECIPES FOR HALLOWEEN NIGHT
EQUIPMENT YOU’LL NEED
Equipment
- Mixing Bowls
- Spatulas
- Rolling Pin
- Parchment Paper
- Knife
Ingredients
- Baked Oreo Cake recipe linked below
- ¾ cup Oreo frosting recipe linked below
- ½ cup white chocolate
- Edible eyeballs optional
Instructions
- Add your baked cake to a mixing bowl and use a mixer or your hands to break it into fine crumbles
- Stir in ¼ cup of your Oreo frosting. You should be able to squish your dough together, almost like Play-Doh. If it seems a little dry, add in more frosting until you get the desired consistency
- Pat your dough into a flattened disc and wrap it tightly in foil before placing it in the fridge to cool for 30 minutes. This will make it easier to roll and cut your dough
- Once chilled, roll your cake pop dough between two sheets of parchment paper to ½-inch thickness. With a knife, cut out 2 ½” x 3” rectangles, re-rolling the dough as needed
- Lay your cut mummies out on a wire rack and place your edible eyeballs on each
- Pour your white chocolate into a microwave-safe glass or pitcher and microwave for 30 seconds. Stir, and return for another 10-15 seconds, stir, and repeat in 10-second intervals until your chocolate is smooth and completely melted
- Allow your chocolate to cool slightly, then add to a piping bag and drizzle your white chocolate over all your cake “pops.” You can use a fork if you don’t have a piping bag.
- Allow the cake “pops” to set for at least 20 minutes in the fridge, or until the chocolate has hardened


YUM – What a treat!
a spooky one at that!