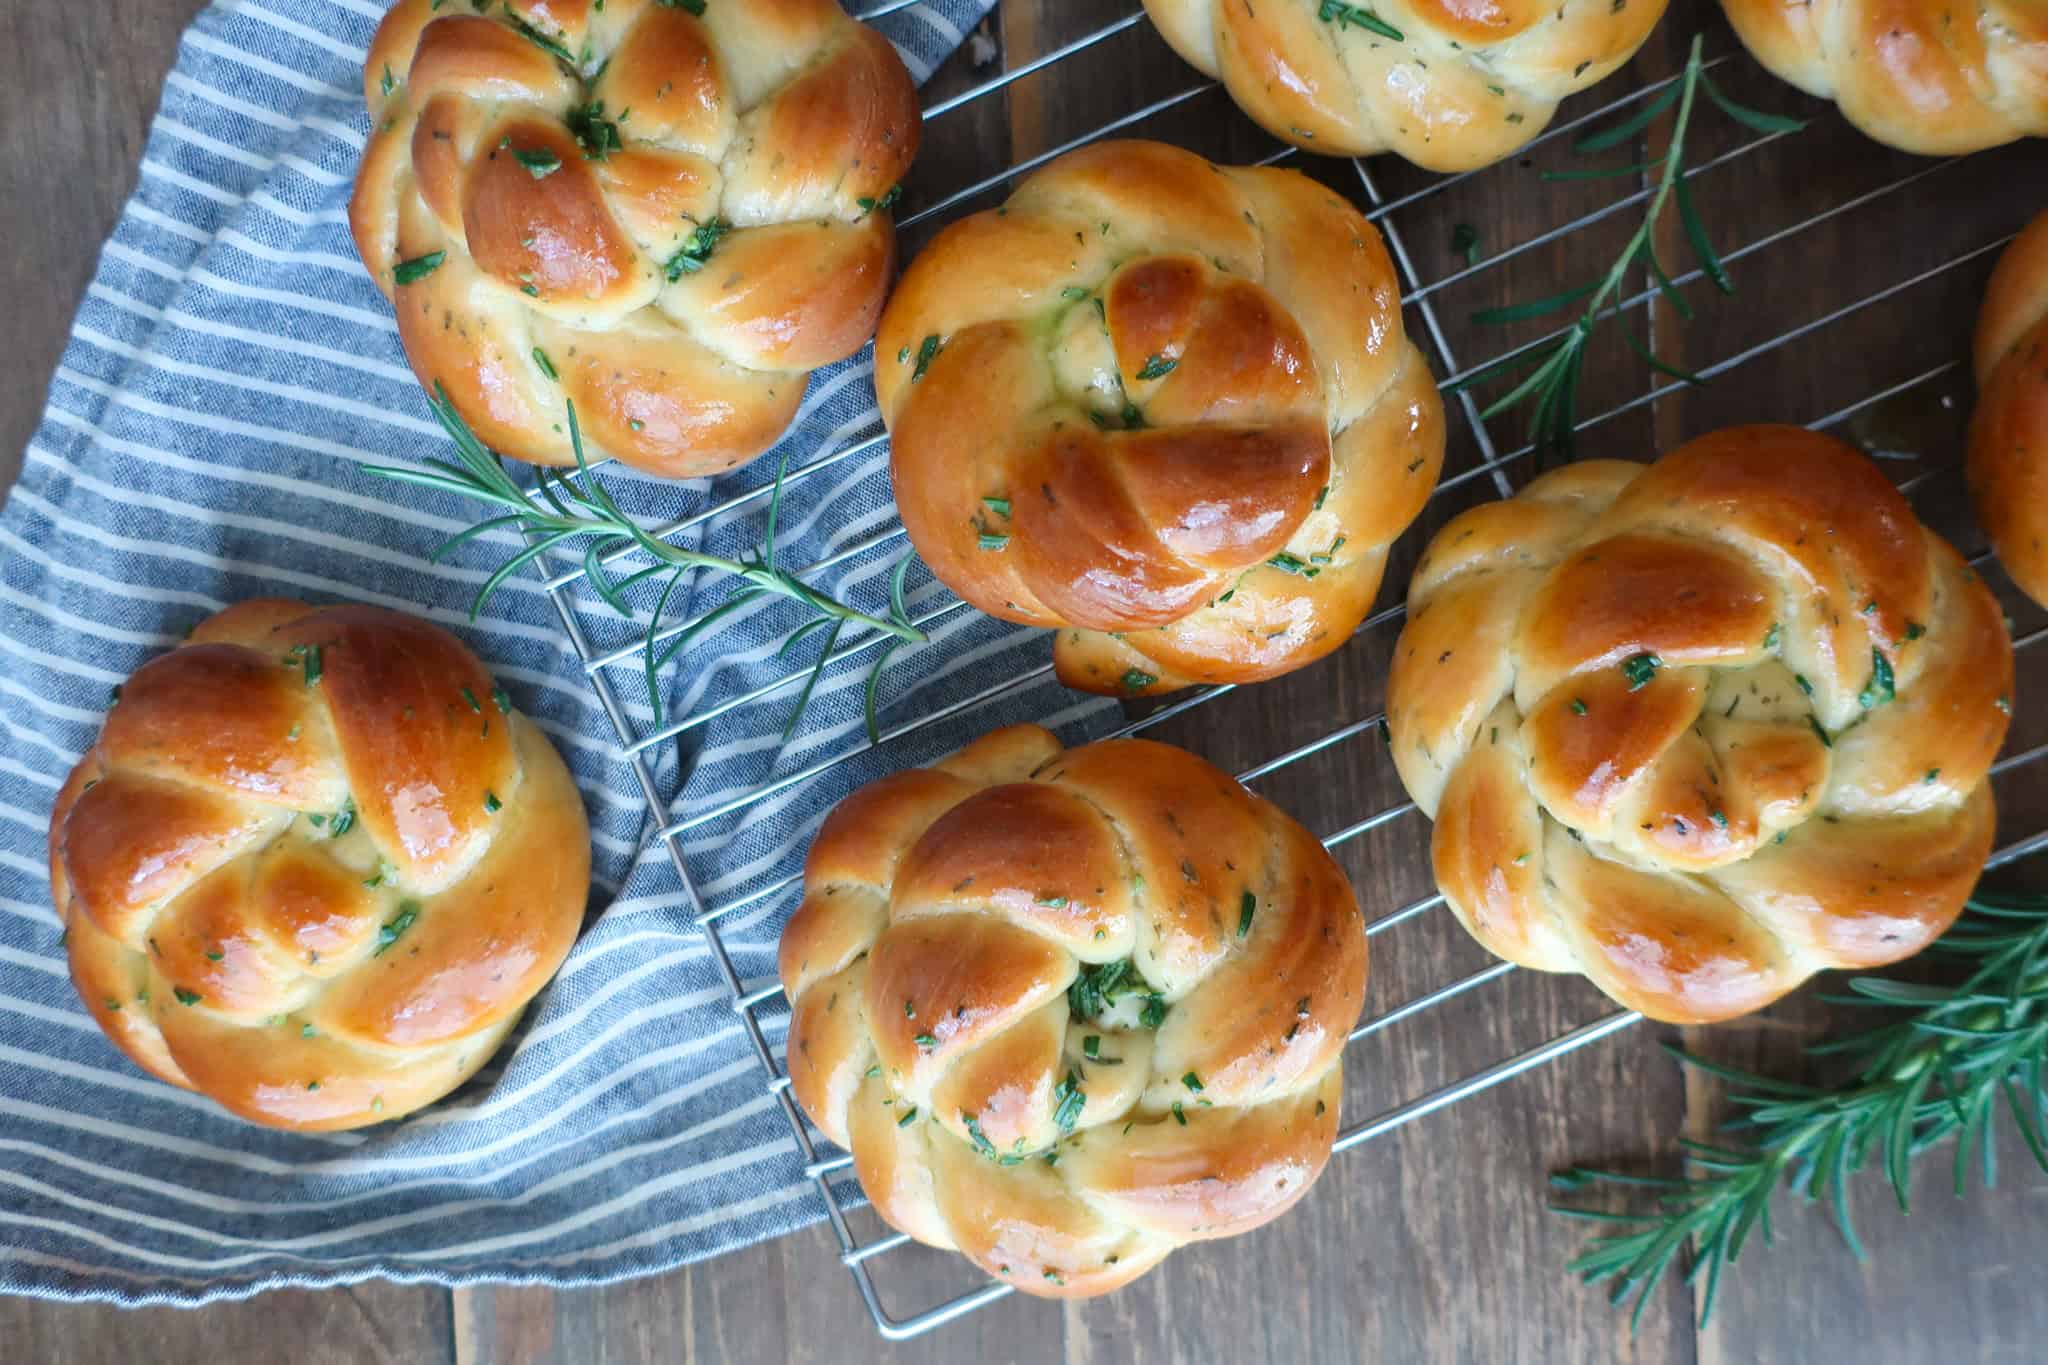
Rosemary Challah Rolls
Rosemary is one of the best herbs, in my opinion, for both sweet and savory baking. The beauty of these rosemary challah rolls (besides their literal beauty, amirighttt?) is that they fairly simply turn into something gorgeous and full of flavor.
Just roll each piece of dough into a cylinder, flatten, cut, and twist! Spiral your twist into a round roll and leave it on your baking tray to rise.
Voila! P.S. I understand that reading that may have made you say “simple??” but I promise they come together easily and are really fun to make.
If you love this recipe, please rate and review it below and tag @accentgolden in your posts on social!
This website uses affiliate links, which may earn commission for purchases made at no additional cost to you.

ROSEMARY CHALLAH ROLLS
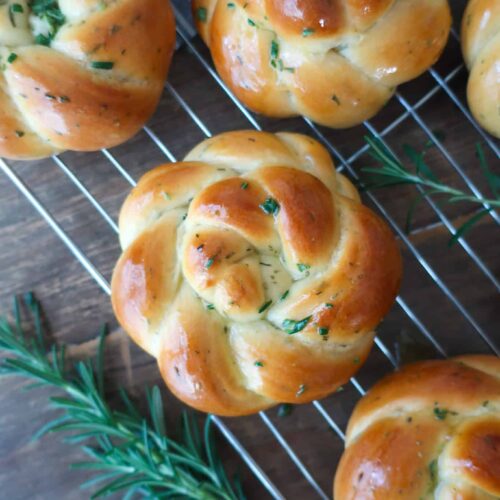
There is something about a fluffy roll, am I right? Yes, I am. Add in some rosemary, and you have fluffy roll magic.
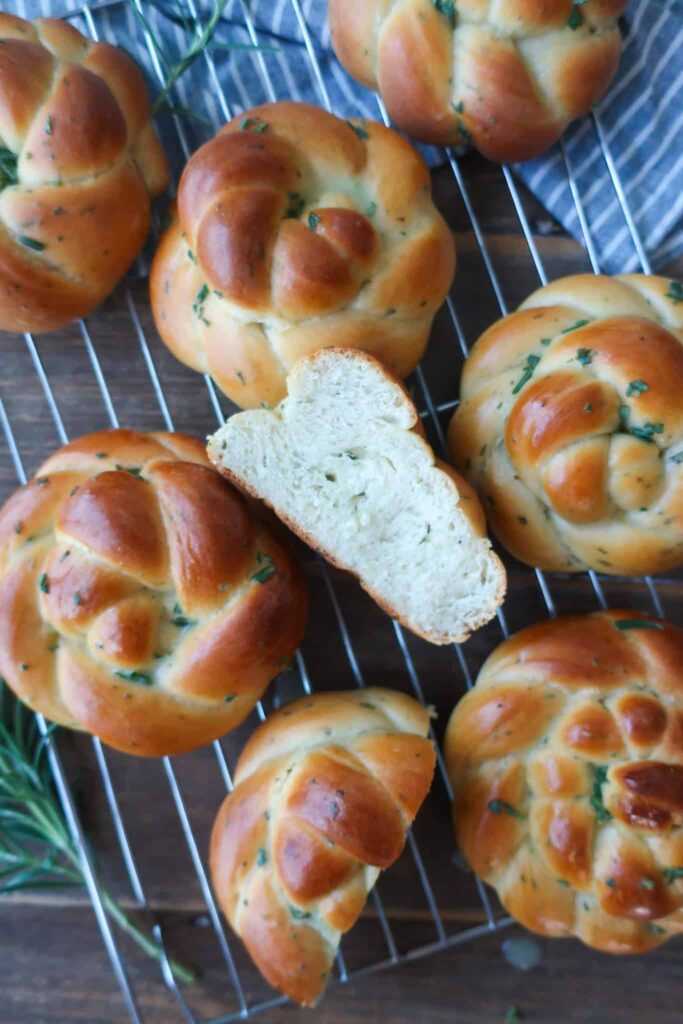
The richness of the challah dough combined with the savoriness of the fresh rosemary makes for a roll texture and flavor match made in heaven. These soft, braided challah beauties will look perfect on your plate as a side or cut in half and used to make a delicious sandwich!
What is challah? Challah is a traditional Jewish bread that is often served on holidays and the Sabbath. It’s an enriched dough, meaning ingredients such as oil, sugar, eggs, and sometimes milk are added to create a rich flavor and soft texture.
INGREDIENTS
- Warm Water: Adds moisture while the warmth activates the yeast
- Dry Yeast: Gives your rolls their rise
- Egg: Adds to the flavor, color, and puff of your rolls
- Canola Oil: Further fat enrichment for a soft and tender loaf
- Honey: Provides a hint of natural sweetness and a little color contribution
- Bread Flour: Makes for a softer texture while providing structure
- Salt: Strengthens the gluten, balances flavor, and aids in the color of the final crust
- Rosemary: Brings a delicious savory bite
- Butter: Gives a finishing gloss
Can I make my rolls smaller? The current rolls are roughly the size of hamburger buns, but if you want something a little smaller, feel free to cut the weight in half to get 16, 47g rolls. Their bake time should be less, so start checking their temperature at the 8-minute mark.
HOW TO MAKE ROSEMARY CHALLAH ROLLS
Start by blooming your yeast…
Combine your warm water and yeast in the bowl of your mixer, fitted with a dough hook, and leave it to sit for 5 minutes, until your yeast has bloomed and become frothy.
Form your homemade challah dough…
Grab a bowl or pitcher and whisk together your beaten egg, oil, and honey until combined. Then, pour half of your egg mixture into the mixing bowl with the water.
Carefully add in your flour and set your mixer to the lowest speed. Keep an eye on it and once it’s mostly combined, add in the remainder of your egg mixture.
You’ll notice the dough start to come together. At this stage, turn your mixer up to a medium speed and knead it for 5 minutes.
Use a dough scraper or firm spatula to scrape down the sides of your bowl, and then turn the mixer to the next highest speed. At this point, you’re looking to get the dough to cling to the hook and “clean the bowl,” aka as the dough hits the sides, it immediately pulls away, taking any dough that was there and leaving a smooth bowl.
Scrape the bowl and give a brief mix one last time if you need to, before adding your salt and some of your rosemary. Mix on the lowest speed just until combined.
Scrape down your bowl and cover with a towel, leaving it to rest in a warm space until doubled in size. This should take about an hour, but see the tip section below if your home tends to be colder.
Weigh your dough into balls…
When your dough has risen, test to see if it’s ready by pressing your finger gently into the dough. You want the indent to slowly release, which lets you know it’s ready to use!
Grab a cutting board, dough scraper, and your digital scale, and start to cut your dough into 8, 94g balls. Each roll will likely start as a pile of scraps as you cut to get the right weight, no worries, you will roll it together shortly.
Make sure that you’re not tearing or pulling your dough as you cut it. Just make as many clean, straight up-and-down cuts as you need to.
Shape your homemade bread rolls…
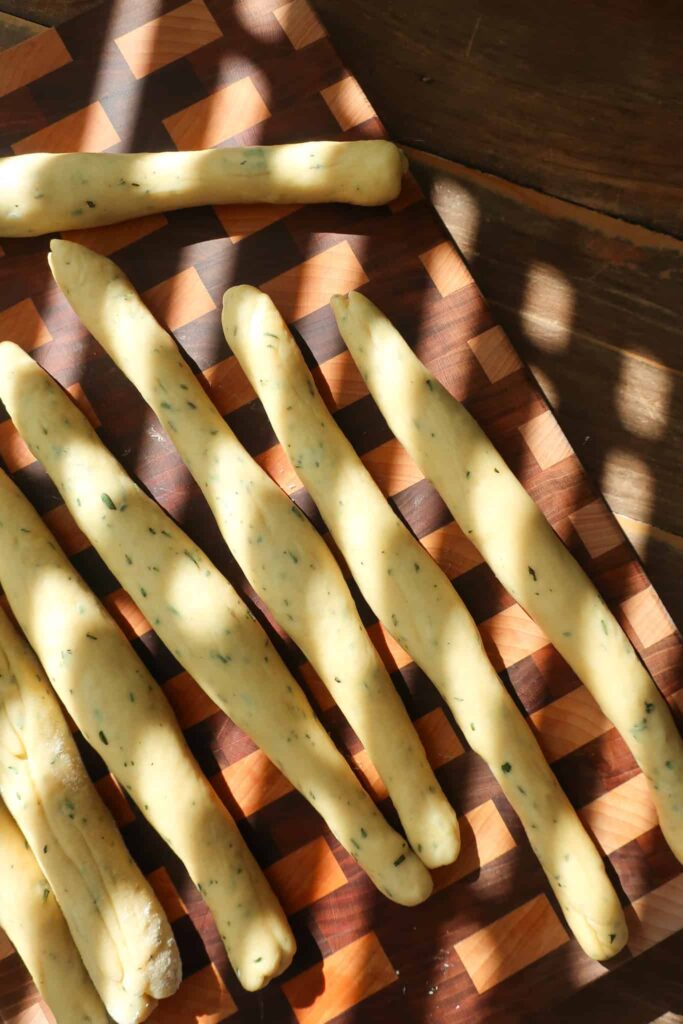
Take one of your balls and flatten it into a rectangle; this will help to degas it. Then roll it into a cylinder, roughly a foot in length, kind of like making a snake.
You can lightly flour your surface as you need to, to prevent sticking, but you don’t want to use too much and dry out your dough. Form all of your dough balls into cylinders and then, one at a time, use a rolling pin to flatten one of your cylinders.
Grab a knife and cut a vertical line starting at the halfway point, splitting the dough down the middle, making sure not to drag your knife. Twist one piece over the other to form a twisted strand, then cut a vertical line from the halfway point upward, and repeat, twisting up.
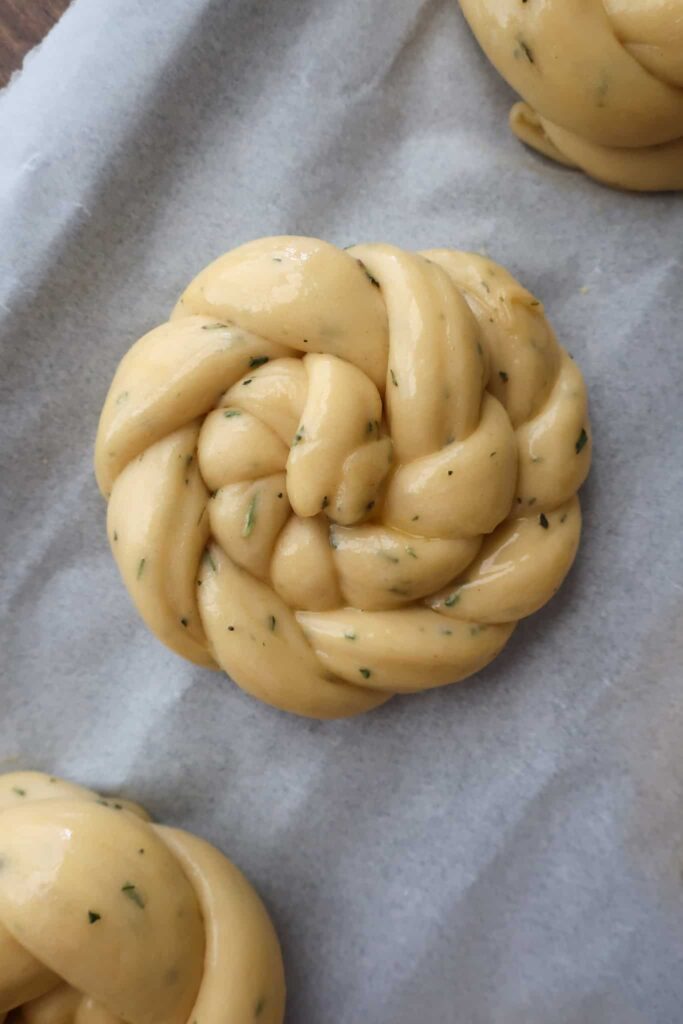
Now you should have one long twisted strand. Hold one end of the dough in each hand and swing it like a jump rope to tighten the twist before holding one end against the counter and swirling the dough in a spiral around it to form your rolls.
Be sure to tuck your end underneath the roll and then place it on a parchment-lined baking sheet. You can bake up to 6 rosemary challah rolls on one large sheet, so have two baking sheets prepped for your rolls to do their final rise on.
Proof and bake your rosemary dinner rolls…
Once your rolls are formed and on your baking sheet, cover them with a towel and let them proof until doubled in size, roughly another hour.
Set your oven rack to the third shelf down and preheat your oven to 350°F. Brush each of your challah rolls with the remainder of your beaten egg.
Bake your rolls for 13-15 minutes, until a digital thermometer inserted into the center reads at least 185°F. Remove your rolls from the oven, place them on a wire rack to cool, and add your second tray to the oven to bake.
Once your rolls are cool, melt the remaining butter and mix in the rest of the chopped rosemary before brushing it over your rolls.
3 reasons you’ll love these rosemary challah rolls
TIPS & VARIATIONS
- Don’t have rosemary? No problem! You can swap in for any herb you have on hand or make your own spice blend. If you don’t have any herbs, these are also delicious on their own!
- Make sure you properly rise your dough. If you live in a colder climate or your house just leans cold, your dough may take longer to rise than mentioned below. As a trick, turn your oven on to the lowest setting and let it heat for a minute or two, then turn it off. Place your dough inside with the door cracked, for a light warmth that should help your dough rise. You can also just place your dough to rise in a cold oven with the light on, the light providing a little extra warmth.
- Yes, you can temperature-check bread for doneness, and I highly recommend it! Use a digital thermometer, inserting the tip into the center of your knot so not to leave a mark. Bread is done at 190°F, though for this bread you can take it out once it hits 188°F, as it will continue to bake once you remove it from the oven.
- These rolls turn out roughly the size of hamburger buns so if you prefer a smaller roll, feel free to weigh them at half the size mentioned below. Keep in mind that a smaller roll should have a shorter bake time, so start checking their temperature at the 8 minute mark.
MAKING AHEAD & STORING
Bread is at its best and freshest the day it is made. These rolls will keep in an airtight bag at room temperature for 2-3 days, but they will lose their softness as time passes.
You can also freeze them in a freezer-safe container for up to three months.
MORE ROSEMARY RECIPES
- Rosemary White Chocolate Thumbprints
- Simple Mushroom & Rosemary Galette
- Rosemary Frozen Yogurt
- Flaky Rosemary Garlic Biscuits
- Soft Lemon Rosemary Loaf Cake
EQUIPMENT YOU’LL NEED
- Measuring Cups
- Measuring Spoons
- Pastry Brush
- Food Thermometer
- Standing Mixer (w/ Dough Hook Attachment)
- Dough Scraper
- Pot
- Digital Scale
- Parchment Paper
- Baking Tray
Equipment
- Mixer
- Dough Hook Attachment
- Dough Scraper
- Measuring Cups
- Measuring Spoons
- Digital Scale
- Pastry Brush
- Food Thermometer
Ingredients
- 1 ½ tsp dry yeast
- ½ cup warm water
- 2 tbsp warm water
- ⅓ cup beaten egg less than two eggs, save the remainder for egg wash
- ⅓ cup canola oil
- 3 ½ tbsp honey
- 2 ¾ cups bread flour
- 1 tsp salt
- 2 tbsp fresh chopped rosemary
- 2 tbsp salted butter melted
- 1 tsp fresh chopped rosemary
Instructions
- In a mixing bowl fitted with a dough hook, combine your yeast and 1/2 cup plus 2 tbsp of warm water. Leave to sit for five minutes to allow the yeast to bloom
- In a pitcher, combine your beaten egg, canola oil, and honey and give a good mix. Pour half of the mixture into the mixing bowl with the yeast/water
- Add flour to the mixing bowl and set to the lowest speed
- Once mostly combined, add the remainder of your honey mixture to the mixing bowl
- When the dough starts to come together, increase the speed to medium for five minutes
- Scrape down the bowl, then increase to the next highest speed. Mix until the dough is clinging to the hook and cleaning the bowl
- If you need to, scrape the bowl down a final time and mix briefly to bring any remaining pieces together
- On low speed, add your salt and 2 tbsp of rosemary; mix until combined
- Scrape down the bowl and then cover with a towel, leave to rest until doubled in size (roughly 1 hour)
- Press your finger gently into the dough. When the indent you made slowly releases, it’s ready!
- Line two baking sheets with parchment paper
- Using a digital scale and a dough scraper (or a knife), split your dough into eight, 94g balls, cutting from other pieces until all come to an equal weight. Do not tear or pull your dough to do this
- Take each of the eight pieces and degas them one by one, flattening lightly into a rectangle
- Gently roll out each piece of dough into roughly a foot-long cylinder. Lightly flour your surface as needed, so the dough doesn’t tear
- One cylinder at a time, use a rolling pin to flatten your piece of dough, and then with a knife, cut a vertical line from the halfway point down, splitting the dough down the middle. Do not drag your knife
- Twist one piece over the other to form a twisted strand. Cut a vertical line from the halfway point upward now, and twist the remaining dough together
- With one end of your twisted strand in each hand, swing the dough lightly like a jump rope to tighten the strands. Then, holding one end, swirl the dough around it to form a spiral, tucking the last end underneath
- Once you've formed your roll, place it on one of the prepared baking sheets. Shape the rest of your rolls, and split them between the two sheets, leaving a few inches of space between each roll
- Once you’ve formed all of your rolls, cover them with a towel and let them proof until doubled in size (about an hour)
- Preheat your oven to 350°F
- Brush your challah knot with the remainder of your beaten egg, be careful not to let the brush pull at the dough
- Bake on the third shelf down in your oven for 13-15 minutes. You will need to insert a thermometer into the middle hole of the dough – probing through the middle crack, don’t poke through one of your pretty knot lines. The temperature should be between 188°F and 194°F for your dough to be fully cooked.
- Remove from oven and place on a wire rack to cool completely
- Melt 2 tbsp butter with 1 tsp of chopped rosemary and brush over your cooled rolls
- Enjoy!