Flaky Rosemary Garlic Biscuits Recipe
At this point, if the baked good can be rosemary-d, I will be doing it. These rosemary garlic biscuits are my latest obsession, and I will be making them on repeat for the foreseeable future.
I’m so happy to be back in the season of fresh herbs. Herb bouquet for you, you, and you (because if you grow herbs, you know that they multiply faster than you can use them, and who doesn’t love an edible bouquet??).
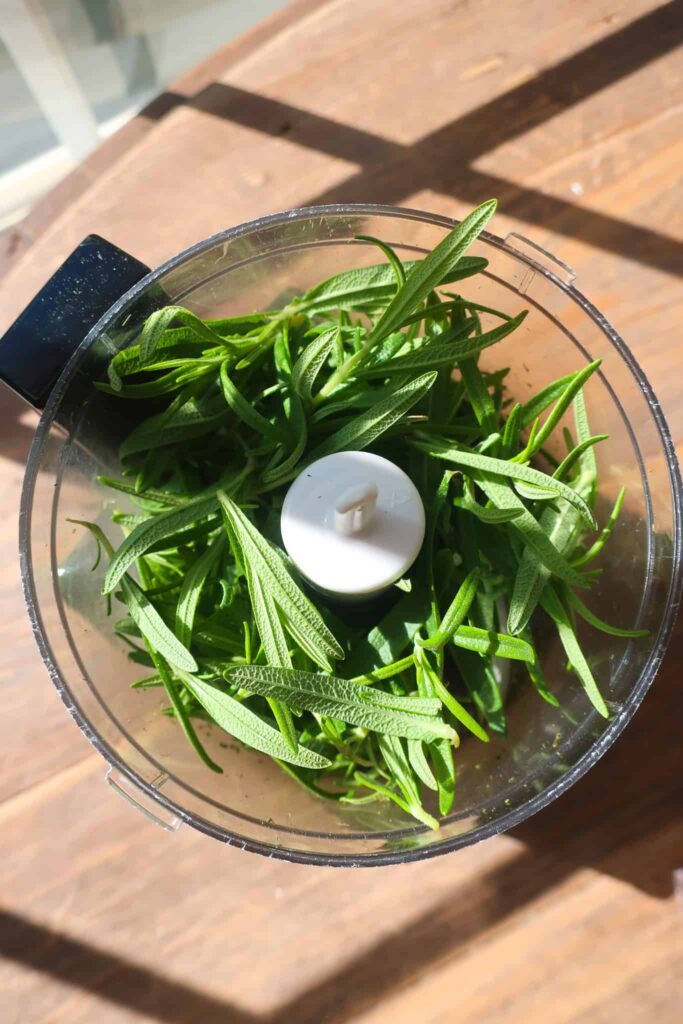
I bought a massive rosemary plant the other day, so I figured before I planted it, we’d put it to work. Because while you can use dried in a pinch, fresh is always gonna be best.
If you love this recipe, please rate and review it below and tag @accentgolden in your posts on social!
This website uses affiliate links, which may earn commission for purchases made at no additional cost to you.
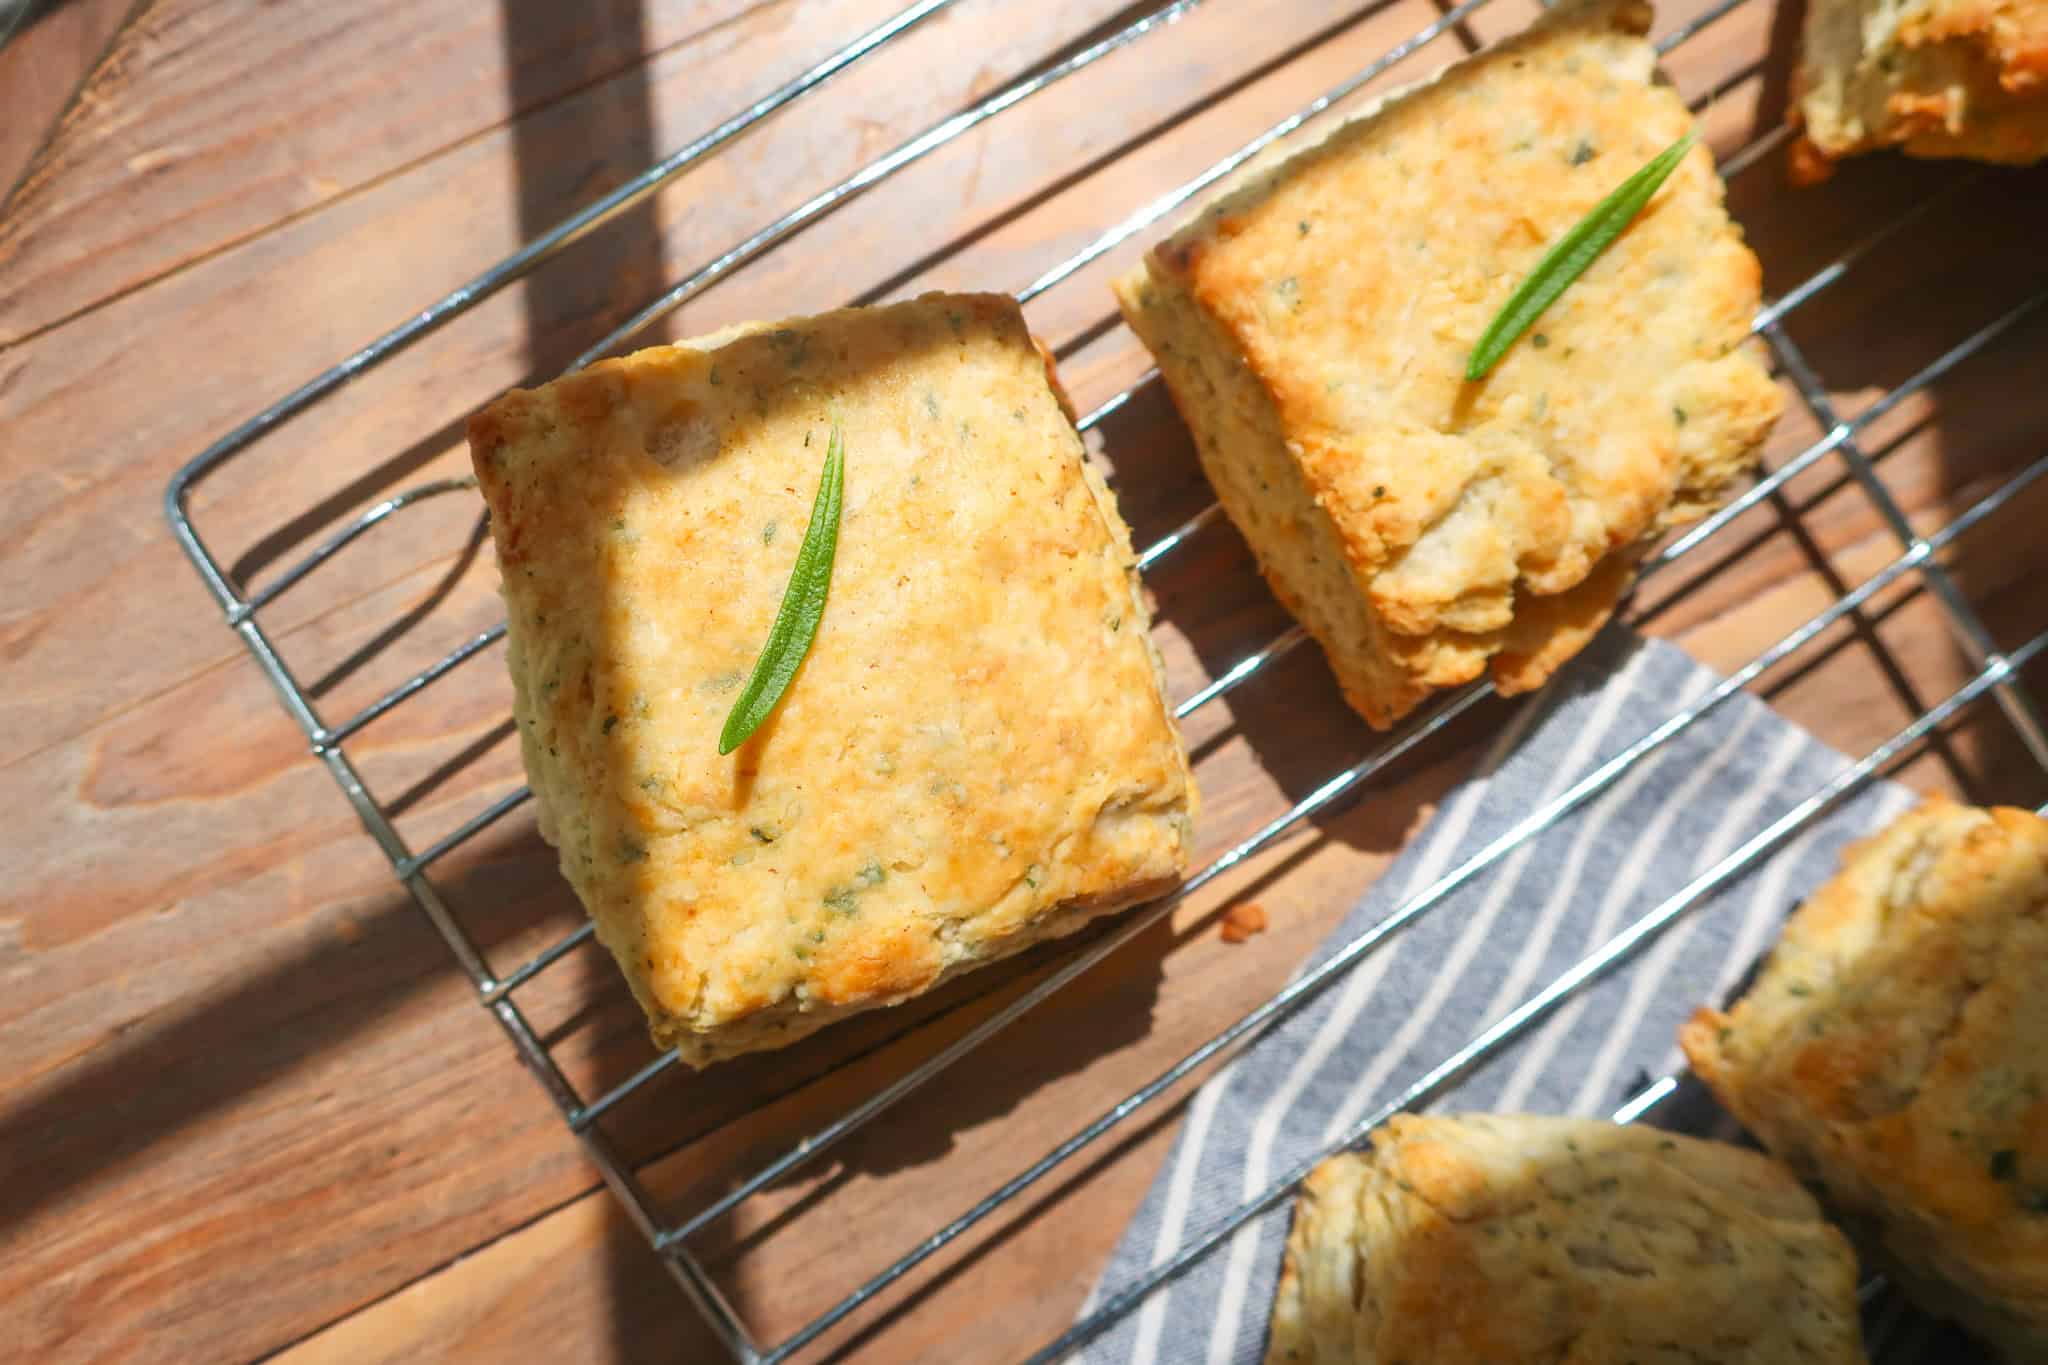
ROSEMARY GARLIC BISCUITS
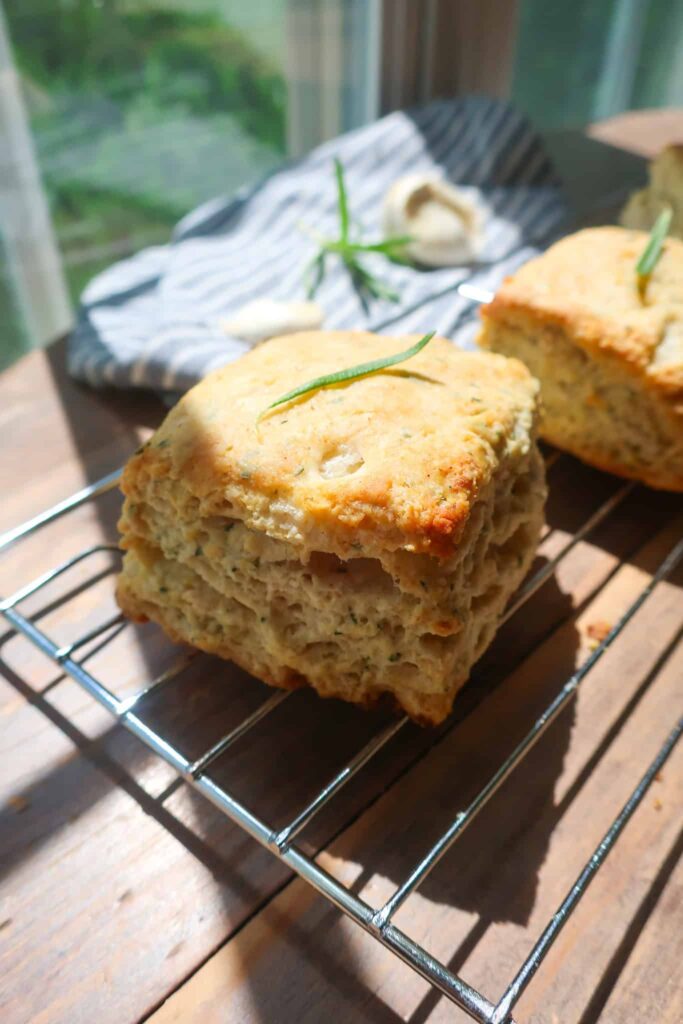
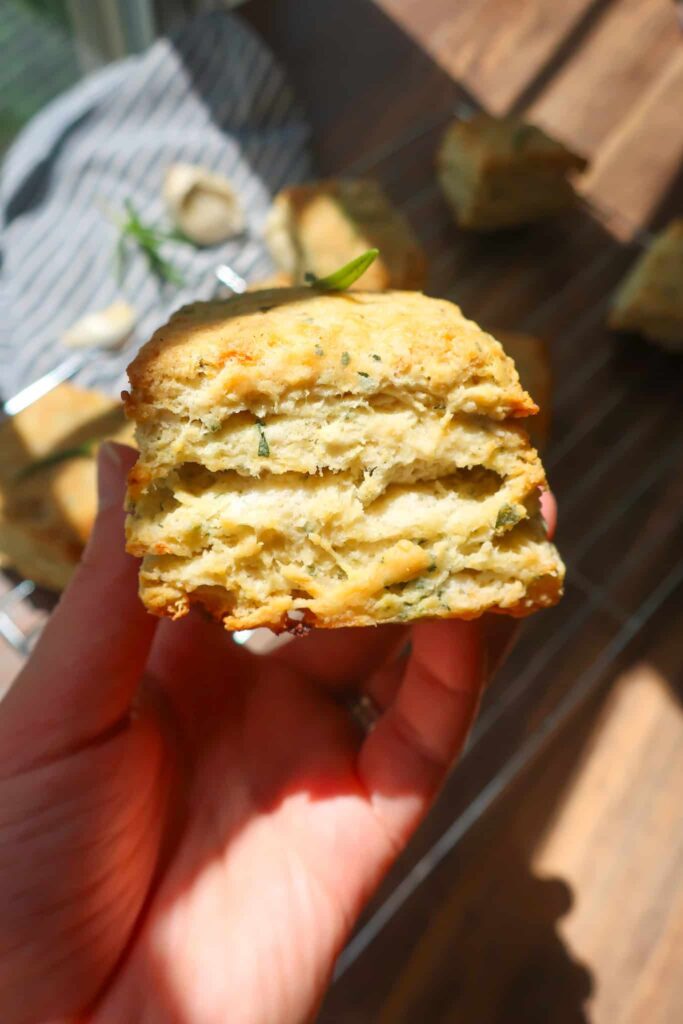
This biscuit recipe is a triple threat: fluffy texture, flaky buttery layers, and packed with so much flavor. These aren’t biscuits with a suggestion of rosemary and garlic; they are rosemary garlic biscuits.
The recipe and ingredients are pretty standard for a biscuit recipe, so nothing out of the ordinary is required to have amazing biscuits for your breakfast and brunch spread. The key is to pay close attention to both the ingredient temperatures and directions, which are crucial for that final biscuit texture.
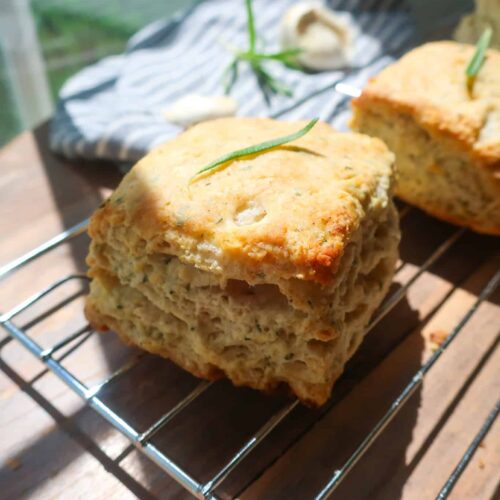
Why does butter temperature matter in biscuit recipes? You want cold butter in the biscuit dough, so it melts and creates steam when it hits the oven, for those flaky layers. Brushing melted butter on top of the biscuits before baking gives a final golden finish and adds flavor.
INGREDIENTS
- All-purpose flour: forms the structure of the biscuits.
- Baking powder: provides rise for a light, fluffy texture.
- Baking soda: helps with rise and tenderness.
- Salt: balances flavors
- Garlic: adds savory, aromatic flavor.
- Fresh rosemary: brings the fresh herbal flavor
- Butter: for flavor and flaky layers in the biscuits and a golden finish on top
- Buttermilk: for even more tender and fluffy biscuits
Can I use dried rosemary for this recipe? I highly, HIGHLY recommend fresh, as the oils add even more flavor, but if you don’t have access to it, dried will work. Simply swap in 1 tablespoon of dried rosemary.
HOW TO MAKE ROSEMARY GARLIC BISCUITS
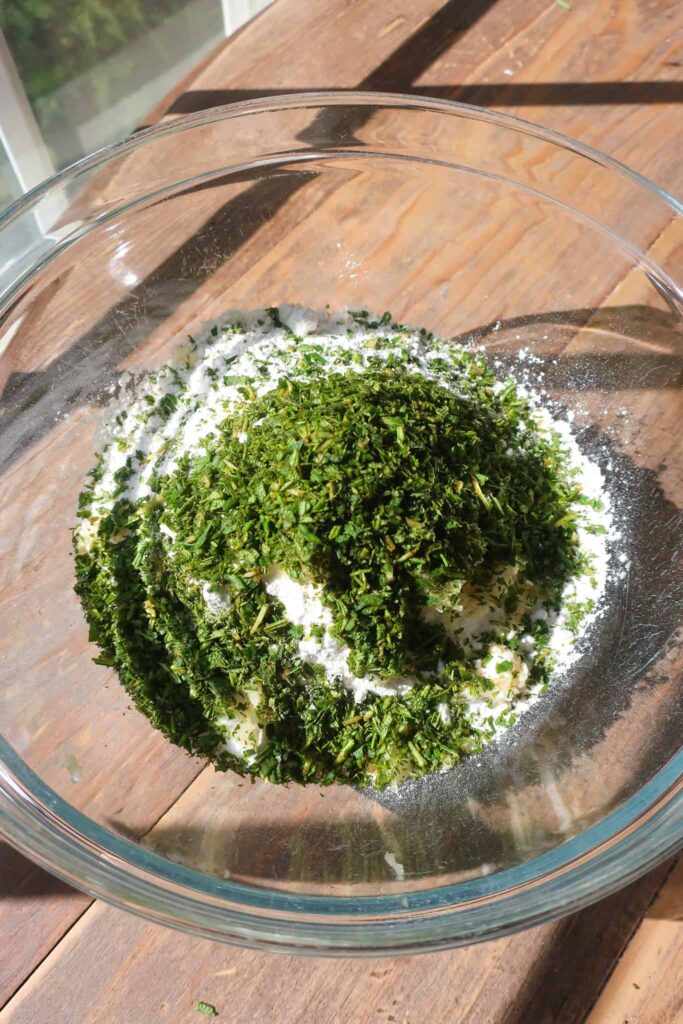
In a large bowl, whisk together the flour, baking powder, baking soda, and salt. Stir in the grated garlic and chopped rosemary to infuse the dough with savory flavor from the start.
Rub in the cold cubed butter until the pieces are roughly pea-sized, swirling the bowl to lift any larger chunks. Pour in the cold buttermilk and gently stir until the dough is mostly combined into a shaggy mixture. Be careful not to overwork it.
Turn the dough onto a floured surface and pat it into a rectangle. Cut it into three horizontal pieces, stack them, and pat into a rectangle, repeating this folding step two more times to create flaky layers.
Pat the dough into a 1-inch-thick rectangle, about 8” x 5”, and use a lightly floured knife or bench scraper to cut out 8 square biscuits. Arrange the biscuits close together, about ½-inch apart, on a parchment-lined baking sheet, and chill in the fridge for 10 minutes to help with rising.
Preheat the oven to 425°F. Brush the tops of the chilled biscuits with melted butter for a golden finish.
Bake the rosemary garlic biscuits for 15–18 minutes until golden brown, then transfer to a wire rack. Serve warm for the best flavor and flaky texture.

3 reasons you’ll love these rosemary garlic biscuits
TIPS & VARIATIONS
- If you don’t have buttermilk, make a simple substitute by adding 1 tablespoon of lemon juice or vinegar to a measuring cup, and filling it up to the 1 cup line with milk. Stir and let sit for 5 minutes before using.
- I highly recommend using fresh rosemary for this recipe. The oils from the herb infuse the biscuits with so much more flavor. If you don’t have fresh, you can substitute 1 tablespoon of dried.
- Make sure the butter for your biscuit dough is cold. This is crucial to getting those flaky layers as your biscuits bake.
- Don’t skip cutting and stacking your biscuit dough before the final roll out. This will create those layers of butter, which are also key for flaky biscuits.
- When cutting your biscuit dough, cut straight down and straight back up. Don’t drag your knife or bench scraper through the dough, or you’ll risk sealing those biscuit edges before baking.
- If you want to cut these into shapes, you can, and then carefully (without messing with it too much) press the dough back together to cut any remaining biscuits. I prefer slicing into squares for evenly baked, layered biscuits (since the re-shaped and cut ones are never as flaky).
MAKING AHEAD & STORING
For biscuits now and later, shape and cut your biscuits into squares. Place them on a parchment-lined plate (without touching each other) in the freezer for 2 hours. Then remove and store in the freezer in a sealed bag or container for up to a month.
You can bake the biscuits directly from frozen, brushing melted butter over the tops before popping them in the oven. They will likely need a few extra minutes in the oven, so don’t pull them too early.
Once baked, these biscuits are best warm, the day they are made. You can store any extras in a container at room temperature for up to 2 days.
MORE BREAKFAST RECIPES
- My Favorite Homemade Bagel Recipe
- Pimento Cheese Biscuits
- Simple Blueberry Syrup
- Apple Cinnamon Scones
- 3-Cheese Quiche
EQUIPMENT YOU’LL NEED
Equipment
- Mixing Bowl
- Measuring Cups
- Measuring Spoons
- Microplane
- Pastry Brush
- Bench Scraper or Knife
- Baking Sheet
- Parchment Paper
Ingredients
- 2 ⅔ cups all-purpose flour
- 1 tbsp baking powder
- ½ tsp baking soda
- 1 tsp salt
- 3 cloves garlic finely grated
- 3 tbsp finely chopped fresh rosemary
- ½ cup unsalted butter cold and cubed
- ¾ cup cold buttermilk
- 1 tbsp butter melted for brushing tops
Instructions
- In a large bowl, whisk together flour, baking powder, baking soda, and salt.
- Stir in grated garlic and chopped rosemary
- Rub in the cold cubed butter until it’s roughly pea-sized. Swirl the bowl if you need to, to bring any big chunks up to the top
- Pour in the cold buttermilk and stir with a spoon until mostly combined into a shaggy dough. Don’t overwork here. If you have some loose flour, don’t worry, you’ll pat it in when you shape it
- Dump your dough on a floured surface and pat it into a rectangle. Use a knife or bench scraper to cut your dough into three horizontal pieces, stacking one on top of the other, then pat down into a rectangle. Repeat this step two more times. This is how you get those layers!
- Finally, pat down into a 1-inch-thick rectangle, roughly 8” x 5”. Then lightly flour your knife or bench scraper, and cut out 8 square biscuits. Cutting straight down and straight back up
- Line a baking sheet with parchment paper and place the biscuits close together on it, about ½-inch apart. This helps with rise. Then pop it in the fridge for 10 minutes
- Preheat oven to 425°F
- Remove the biscuits from the fridge and brush the tops of each with the remaining melted butter
- Bake 15–18 minutes until golden, then remove from the pan to a wire rack and serve warm!